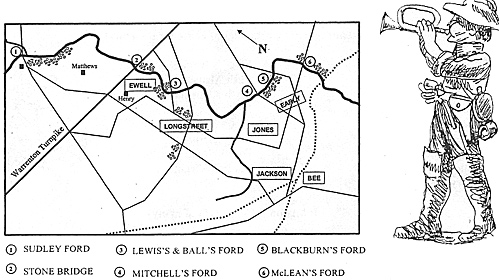
As promised in Part I, this piece is a narrative accounting of one of the solo battles of Bull Run I fought out on my 4 x 8 table. As a refresher, I set up the scenario with me, the solo player, commanding the confederate forces. I automated the union army. My tabletop looked like the one here.
My mission, as Confederate commander, was to keep the D#@%&*d Yankees on their side of Bull Run. My constraints were to keep Johnston's forces (Bee's and Jackson's brigades) at Manassas Junction and to have no forces north of the Warrenton Turnpike. As you will see from the order of battle, I had six brigades while the union could commit up to eight brigades to the fight. My regiments tended to be a bit larger than Yankee units so the disparity was not as pronounced as it seems.
I used some very simple home-grown rules which emphasized two notions. First, since units at First Bull Run were fairly brittle, even receiving light fire could cause a unit to stop in its tracks or even recoil. Second, even if a unit was not receiving fire, there was some probability that the unit would either not move its entire distance toward an enemy unit or perhaps refuse to move altogether. This reflected a lack of training in regimental maneuver plus an inexperienced chain of command. Together, these rules tended to make it difficult for units to close to hand-to-hand contact.
I also used specialized rules for crossing fords and bridges. The crossing unit had to be in column formation. Crossing a ford was a particularly tedious process. I only allowed three companies (stands) to cross each turn. This meant union forces were backed up at the fords for some time before they could get everyone across and reformed.
 The Opposing Forces
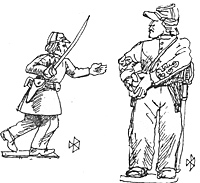
Frankly, I don't have enough figures to populate the entire order of battle from First Bull Run. I use 22mm/HO figures mounted two to a stand. I use a variety of models: old airfix plastics, RSM, and Musket Miniatures as well as some others I still can't identify. Some of the figures are real veterans, having been used in wargames since the late sixties.
Each stand represents a company. While I tried for ten companies per regiment, some had as few as eight and others as many as fourteen companies. Also, I built my brigades to consist of only two regiments. The brigade might or might not have an attached artillery battery. For the confederates, I assigned batteries before the game started. For the union, I rolled to see if a brigade had artillery attached to it. I assigned a single mounted general as the brigade commander. In these rules, a commander could only influence one of his regiments at a time. This was consistent with the actual battle. The visual impact on a 4 by 8 table was quite satisfactory. Troops weren't packed too tightly but instead there was plenty of maneuver room, kind of like the historical battle.
Confederates
Beauregard's Corps (2/3 of confederate army)
Longstreet's Brigade Fifth North Carolina. First Virginia. Battery artillery
Jone's Brigade: Seventeenth Mississippi. Eighteenth Mississippi Battery artillery
Ewell's Brigade: Fifth Alabama Sixth Alabama
Early's Brigade: Fourth South Carolina. Seventh Virginia
Johnston's Corps (1/3 of army)
Jackson's Brigade: Second Virginia Infantry. Fifth Virginia Infantry. Pendleton's Battery.
Bee's Brigade: Fourth Alabama Infantry. First Tennessee Infantry. Imboden's Battery.
Union
Sherman's Brigade: 13th New York 69th New York
Porter's Brigade 14th New York 27th New York
Howard's Brigade: 3rd Maine 4th Maine
Blenker's Brigade: 8th New York 77th Pennsylvania
Keyes Brigade: 2nd Maine 1st Connecticut
Franklin's Brigade: 5th Massachusetts 10th Massachusetts
Davie's Brigade: 16th New York 18th New York
Schenk's Brigade: 1st Ohio 2nd Ohio
 Mechanics of Play
This is a solo game. For me, the key decisions I wanted to be made at random was the timing and location of each union brigade coming into battle. My system was quite simple and actually played out better than I expected. At the start of each turn I rolled to see if a union brigade would show up at a ford/bridge site. There was a one-third probability that this would occur. If a brigade showed up that turn, I rolled again to determine at which site it appeared. Six sites, six sides on a die. Coincidence? I think not.
Once I knew which site the brigade was to appear at, I rolled a final time to see if the brigade had an artillery battery attached to it. This mechanism could have resulted in brigades appearing randomly at random sites. I was willing to accept this result as being consistent with the poor staff work and sub-optimal execution that both sides exhibited at First Bull Run. It even had the possibility that two brigades would show up at the same site separated by only a few turns. Since crossing a ford was such a time-consuming process, this meant that union forces could be stacked up for awhile on the north side of the Bull Run waiting to cross. If the confederates were opposing the crossing, it was then theoreticallypossible for a small rebel force to keep one or more enemy brigades bottled up, unable to bring their full force into battle. That is exactly the kind of random events I wanted to simulate, and I succeeded!
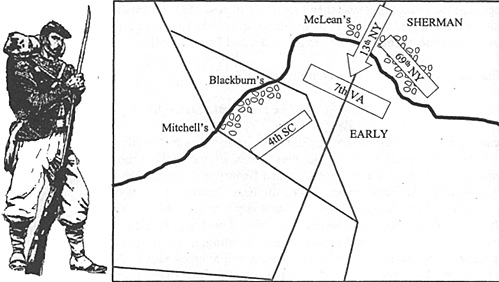
What follows is a narrative accounting of the battle.
Going It Alone: The Solo Wargamers Corner First Bull Run (part II):
Going It Alone: The Solo Wargamers Corner First Bull Run (part I):
-
Introduction and OOB
The Desperate Struggle
Orders of Battle: USA and CSA
The Battle
Solo Rules
Cohesion, Command, and Control
Back to MWAN # 122 Table of Contents
Back to MWAN List of Issues
Back to MagWeb Magazine List
© Copyright 2003 Hal Thinglum
This article appears in MagWeb (Magazine Web) on the Internet World Wide Web.
Other articles from military history and related magazines are available at http://www.magweb.com