Action at Sahay
Here the battle report of the game from the War of the Austrian Succession. The scenario is described here.
Order of battle
The order of battle has been taken from Grant’s book and slightly adapted to be used for Honours of War. The scale that Grant chose to organise the scenario was 2:5 for all unit types, including guns, which in Honours of War are representing four guns per base.
Austrians
- CinC, 3 brigade commanders
- 5 line infantry battalions
- 2 small Pandour light infantry
- 1 small Hussar regiment
- 1 Cuirassiers regiment, superior
- 1 small Cuirassiers regiment, superior
- 1 Medium artillery battery
French
- CinC, 4 brigade commanders
- 8 line infantry battalions
- 1 grenadier battalion, superior
- 1 Hussar regiment
- 1 Horse regiment, superior
- 1 Dragoon regiment
- 2 Medium artillery batteries

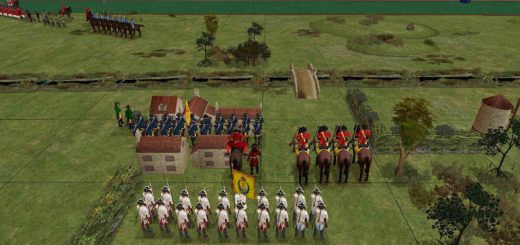
The initial deployment is done. On the French side, all heavy cavalry is on the right, in front of the two small woods at the right of the village of Sahay.

The infantry is organised in three brigades, they are deployed just between Sahay and the large wood. The French Hussars are deployed on the left, aiming to enter the woods and hit any light troops who might be defending.

The Austrian infantry is all deployed in a single line, covering the gap between Sahay and the wood, also extending to the left of the village, where the two small woods are.
Behind the infantry the two regiments of Austrian cuirassiers are standing in support.

The Austrian light infantry is deployed in the wood on the right and to the left of the village.

The Austrian hussars are deployed on the extreme left, behind the small wood close to Sahay.

The attack begins with a very limited advance of the French cavalry, which in the subsequent hours will stop and observe the development of the battle.

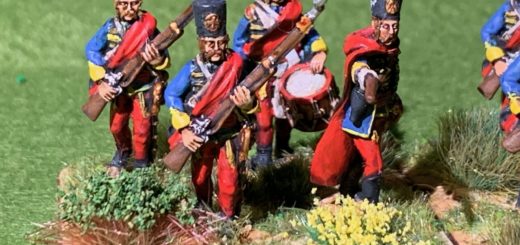
The french advance at a slow pace, carrying the attack first to the village, then on the extreme left and then to the centre. The french troops are arrayed in a double line on the flanks and in a single line in the centre, where the Swiss grenadiers are.


The firefight starts at long range, with modest effects on both sides, only the french artillery manages to make some damage.

The Swiss grenadiers manage to close by, while the battalion attacking the village is repulsed with heavy casualties.

At the center of the austrian line, one battalion retreats after being exposed to grapeshot and musket volleys. The issue with the Austrian commander is that he decided to move the Curassiers deployed in support of the infantry to the left, to counter the French Cavalry, which in fact does not advance.

The Swiss are hit at pointblank by grapeshot and musket volleys, but they do not retreat!
The village and the left of the austrian force holds and the french do not manage to come to close range.


But the right wing of the austrian line in in real danger, with the croats expelled by the wood by the hussars and retreating. Only one battalion against three holds the line.


A birds’ view of the battlefield. The austrians will manage to leave the battlefield under cover of the Curassier regiments, but the position is lost and the siege is abandoned.

Many thanks to Riccardo and Diego for the excellent afternoon and the nice game!