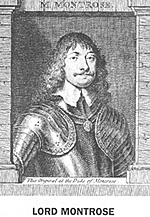
After gathering your forces you have gone in search of the Government's new army. This was found about a week ago and you have been chasing it until yesterday. As you approached Inverness the enemy broke contact. You have camped around Auldearn to rest and to prepare to take Inverness which would be a major coup for your forces. With the extra support this would bring you are confident that you could go on to claim all of Scotland for the King.
Just before dawn it is reported that the enemy is rapidly approaching your camp. You have been surprised! Macolla gathers some troops to slow the enemy down and hold the village in order to buy time for Montrose to gather the rest of the army and counterattack.
The enemy is believed to have 20005000 foot in 3-8 regiments. This includes some regiments withdrawn from England but also a substantial number of recently raised levies. The enemy horse outnumbers your own but much of it is very poor quality (and your cavalry is probably the best in the country). Although surprised and outnumbered you are confident of victory as your troops are battle hardened veterans who have already defeated the enemy in 3 pitched battles whilst your charismatic leaders are far superior to the poltroons who serve the government!
Objective is to hold Auldearn AND crush the enemy army. Any other result is a defeat!
The ratings of Montrose and Macolla really depend on which of the many writers on this period you believe. I suggest you allow the Rebel player at the start of the game to make one excellent and the other average. Lucky leaders should be given a bonus on their saving rolls if hit (or are harder to hit), unlucky the reverse.
Note that if using 'Forlorn Hope' Aboyne may always change his orders (without having to roll). In the actual battle Aboyne demonstrated a fine sense of timing and controlled his horse extremely well.
Units should be issued orders as they arrive on the battlefield.
Reinforcements appear anywhere on the Rebel baseline. Their exact arrival point must be noted down 2 turns before they actually appear.
UNIT NOTES
Ratio is the proportion of Shot to Pike in the unit.
The Irish Shot unit is rather akin to a forlorn hope of commanded shot. I suggest you allow it to fight either as a formed unit or a skirmish unit.
It is suggested that for this battle the Irish are treated exactly as a normal Musket & Pike unit (i.e. no special Salvo rules, no special charge rules etc. etc.). However, if using Forlorn Hope you should give them each an 'integral' leader (value 1).
The exact composition of the 'Gordon Foot' is impossible to determine, they may have been another battalion of Strathbogie or a motley collection of assorted rebel troops. It is possible that about 1/3 of them were Highlanders but if you follow this option you end up with some rather small and scrappy units which are not really viable on the wargame table. Therefore I suggest you treat them as listed - a single conventional Musket & Pike unit.
Minimore is represented by a standard Musket & Pike unit. Again it is possible there may have been some Highlanders in this unit. If you feel a battle in Scotland is not complete without a Highland unit change Minimore to: Highland, C, Exp-Elite.
The Gordon/Aboyne horse were probably not true Gallopers as Forlorn Hope uses the term. However they certainly charged with rather more 'elan' and impact than other Scottish horse (a tactic which seems to have surprised everyone!). They would also appear to have had an abundance of firearms (in typical Scottish fashion). If using Forlorn Hope I suggest the following: If they have not yet fired and declare a charge the owner decides if this is at the trot or gallop (with all the benefits & disadvantages the mode selected). If they have already fired they can only charge at the trot. These units are both deemed armed with pistols and can fire in either 1 or 2 ranks. They cannot fire and charge.
A Forlorn Hope cannot be formed for this battle.
Ammunition. Unlike previous battles the Rebels do not appear to have had a shortage of ammunition at Auldearn. Disregard any references to limited ammo in rules.
TERRAIN
The central hill appears to be difficult terrain for Horse (the Govt. believe it is difficult terrain).
Castle Hill is very difficult terrain for Horse and difficult for foot.
The Village is impassable to Horse and difficult for Foot. It will give protection against fire and a bonus if defending in melee. Command and rallying will be difficult in the village.
The marsh is impassable to Horse and difficult for foot. It is deemed to be below all other terrain.
The streams will have little or no effect.
REBEL FORCES
CinC MONTROSE AVERAGE/EXCEELLENT
Foot MACOLLA AVERAGE/EXCELLENT, LUCKY
Horse LORD GORDON AVERAGE/EXCELLENT, UNLUCKY
AT START FORCES
Irish Shot 8 figs B, VET 1:0
'Gordon' Foot 15 figs C, EXP 3:2
These forces together with Macolla are positioned anywhere on the 'central' hill.
REINFORCEMENTS
Irish Foot 18 figs A, VET 2:1
Irish Foot 18 figs A, VET 2:1
Strathbogie Foot 24 figs B, EXPNET 2:1
Minimore Foot 15 figs C, EXP 3:2
Gordon Horse 7 figs B, EXP Gallopers/Trotters
Aboyne Horse 5 figs B, EXP Gallopers/Trotters
'Dummies' 6 See scenario rules.
OOB Includes erratta from issue V1 n1--RL
Auldearn: 9th May 1645 An English Civil War Scenario
Back to Battlefields Vol. 0 Issue 0 Table of Contents
Back to Battlefields List of Issues
Back to Master Magazine List
© Copyright 1995 by Partizan Press.
This article appears in MagWeb.com (Magazine Web) on the Internet World Wide Web. Other military history and related magazines are available at http://www.magweb.com