 Background
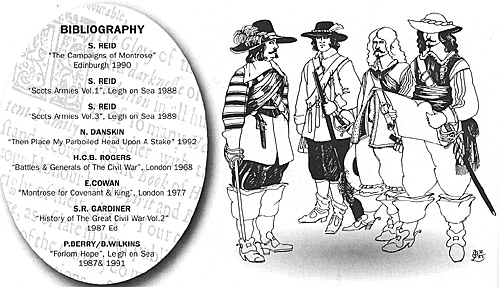
- Auldearn is considered by many to be one of Montrose's greatest victories - a tactical masterpiece brought about by careful planning, shrewd deployment and immaculate timing. Stuart Reid paints a rather different picture in 'The Campaigns of Montrose' (Mercat Press, Edinburgh 1990). I do not wish to go over this debate again here, this after all is a wargaming magazine, but rather to present Auldearn as a scenario which generally follows the course of events outlined by Stuart Reid. As such this should provide the Rebels with a challenge (with the oppertunity of creating the tactical masterpiece outlined by Gardiner and his followers) whilst giving the Government a real chance of winning.
- The scenario starts with the premise that the Government forces have surprised the Rebels who are currently unprepared for battle. Hurry should be encouraged to push on and roll up the rebels before they can deploy. The Rebels meanwhile will be desperately attempting to buy time so that they can form a battleline and launch a counterattack. However this scenario does not totally invalidate the 'grand ambush' idea proposed by Gardiner (and many subsequent writers). The mechanics detailed below may allow a skilful Rebel player (or players) to spring a surprise on the Government and consequently roll up the enemy army. At the very least they should create some concern and uncertainty for the Government, thereby simulating Hurry's hesitation when it appeared the Rebel army was there for the taking. Unlike some other lists, the armies here are fairly conventional and there is not a huge qualative difference.
- The game is fairly straightforward although the umpire will have to do some groundwork in advance, primarily in preparing the briefs and OOBs (copies of which are included here) and constructing the rebel reinforcement markers. It is suggested that once the briefs have been distributed to the players planning and discussion time is kept to a minimum - especially for the Rebels (who are in the main snoring in their beds when the game commences!). The umpire should have some scope to be fairly 'creative', both when preparing the scenario and during the game itself.
REBEL REINFORCEMENTS
Prior to the start of the game the umpire should prepare a set of markers for the Rebel reinforcements. Each unit has its own marker. In addition there should also be an equal number of 'dummy' markers. When we played this scenario the markers were pieces of card, the exact dimensions of the units the represented -this has the added benefit that when a unit is revealed it can be placed on themarker which then acts as a movement tray speeding up the play of the game. It also gets around the potential problem of deciding if a unit can actually fit in the space etc. On the underside it should be noted if the marker represents an actual unit, and if so which one or a dummy. The Rebel player obviously knows which markers are which, the Government player only finds out when the marker is 'spotted'.
Montrose when he arrives is automatically spotted due to his enormous standard. Some say this was a deliberate ploy by Montrose -that he made himself extremely visible and positioned himself away from the main body of his troops to further confuse the poor old Covenanters!
 SPOTTING MARKERS
The Government player can attempt to spot markers at the end of his movement phase. Roll 2D6 and add 12. Any marker within this distance in inches of a Government unit is revealed. This distance is halved for Rebel units in/on 'Montrose's Hollow' or if the spotting unit is currently firing. A marker which is spotted is either exchanged for the indicated figures (as stated on the marker) or removed if a dummy. Obviously the Government cannot spot units which they do not have a valid line of sight to. The umpire is encouraged to use his initiative with this!
REBEL REINFORCEMENT SCHEDULE
Again the umpire will need to prepare this before the start of the game. The arrival times of the various Rebel units should be determined by the movement rates of the rules you are using. Calculate how long (in turns) it will take the leading Government foot units to reach the marsh in front of Auldearn village if they move approx. 3/4 speed each turn. This is the turn on which the first Rebel reinforcements arrive. 2 turns before a unit is scheduled to arrive the Rebel player must make a note of where it is to appear. It is up to the umpire to decide if the Rebels should know before the game the exact arrival schedule of their reinforcements.
THE FIRST REBEL UNITS TO ARRIVE ARE: Strathbogie and up to 2 (any) 'dummies'.
FOLLOWING TURN: Aboyne, Minimore and up to 3 'dummies'.
TURN AFTER: All remaining units, leaders and dummies.
Once again let me emphasise that the Rebels know exactly what their markers represent.
Also note that the Government brief hints that the Rebel reinforcements will arrive from behind or to the north of Auldearn - when in actuality they can arrive anywhere along the rebel baseline. Again this is deliberate.
TERRAIN
As every set of rules treats terrain differently what follows are guideline which the umpire should use to determine the exact effects depending on the rules he will use to refight the battle.
- Auldearn village provides significant protection against fire and offers a defensive bonus in melee. However it is a significant obstacle to movement and troops within it should suffer from disorder and/or command control problems. If using Forlorn Hope I suggest a penalty for units attempting to rally and change orders within the village.
- The marsh will be a significant obstacle to foot (1/2 speed and possible disorder?) and impassable to horse. Troops firing from it and attempting to charge out of will be penalised.
- The 'central hill' should pose no difficulties for foot. For Horse it is somewhat different. It is said that one reason why Macolla initially deployed here is because it was bad ground for horse (and the government horse showed little enthusiasm for climbing onto this hill), however during the actual battle the rebel horse appears to have had no problems at all moving and charging on it. I suggest that you either a) make it disordering terrain for government horse but clear for rebel or b) say that the half of the hill nearest the government entry area (the 'front' 1/2) will disorder horse if they climb onto it here, the other 1/2 of the hill ('rear' 1/2) does not effect horse. Horse are also not affected if they move to the front 1/2 directly from the rear 1/2.
- 'Castle Hill' is impassable to horse and will slow down and disorder foot.
- All other hills are merely 'low' hills. They do not effect movement. The umpire may wish to give a bonus for troops in melee if they are upslope of their enemy (and the same applies to the centre hill).
- The streams have no effect on movement or combat.
Note that in their briefs the two sides are given slightly different information concerning the terrain (the Rebel brief is accurate, the Government contains some false information). This is deliberate. If the Government player(s) ask questions on the terrain the umpire should be evasive with his answers (perhaps he can roll some dice and mutter vague clues etc.).
THE GAME
The OOBs are calculated at an approximate 1:20 scale. My thoughts and notes on the armies are with the OOBs.
We used 25mm figures on a 6'X6' table. If using 15mm figures you may wish to reduce the size (perhaps to 4 X4) . The game itself took about 2 1/2 hours (and ended in a Rebel win although there were a few turns when it was 'all in the balance'). The Rebels managed to hold the Governement assault in the centre (at a cost of very heavy losses) and then cave in the Government flanks. The Government lost because after pushing the Rebels back in the centre they couldn't reorganise their forces fast enough to maintain the momentum and so allowed the Rebels to sieze the initiative and mount a counter attack.
I suggest you have 2-3 players on each side (although it is perfectly playable with only one player a side). The advantage of more players is that it helps replicate the command confusion both sides experienced during the battle (and will give you a fast moving game). Although there is only one Government leader represented I suggest additional players command the various 'waves' of troops as they arrive. To get the full benefit of this scenario you do really need an umpire.
When we played this scenario we used our own rules. However I see no reason why it shouldn't work equally well with other sets - especially Forlorn Hope (for which I have provided unit ratings). I know the figure scale is rather less than that advocated by Forlorn Hope but from experience this has never been a problem.
If you wish to play this scenario but don't have any Scottish troops I wouldn't worry overmuch. There are no Highlanders present (well not as individual units) and all the foot and horse regiments would have been fairly conventional in appearance and equipment.
In our experience the game is fairly close (which the player commanding the Covenanters thought was a refreshing change). The Government to win needs to push forward aggressively and put the Rebels under constant pressure. The quality of some of his foot regiments may come as a surprise to the Rebels and he also has the advantage of numbers. The Rebels have to stabilise the situation whilst at the same time preparing to launch a counterattack. Although starting on the defensive the Rebels have to do more to win which should pose something of a challenge. Although the rebels have the advantage in terms of quality I make no apology for not making the Rebel force some sort of super army.
You may have noted that whilst the design of the scenario does not 'set up' the Government as the 'fall guys' for a masterstroke by Montrose it does allow the Rebels to achieve the same result if they are skilful and fast enough. This is deliberate.
Finally, if you disagree with any of this scenario please feel free to change it. None of it is 'set in stone'.
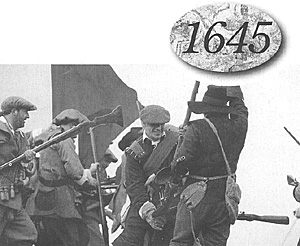
Auldearn: 9th May 1645 An English Civil War Scenario
Back to Battlefields Vol. 0 Issue 0 Table of Contents
Back to Battlefields List of Issues
Back to Master Magazine List
© Copyright 1995 by Partizan Press.
This article appears in MagWeb.com (Magazine Web) on the Internet World Wide Web. Other military history and related magazines are available at http://www.magweb.com