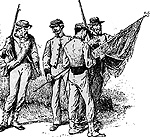
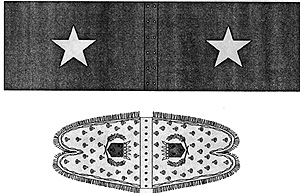
 To start mounting a flag, you need a flat toothpick, sharp scissors, X-acto knife (with sharp blade), white glue (like Elmer's or white model glue), flat matte sealer, a flag, and a flag staff. Some miniatures come with flag staffs cast in lead/pewter as part of the figure. Although this isn't usually the best material on which to mount a staff, it does work. The best flag staffs are made from a thin gauge piano wire, but other usable material includes copper wire strands, paper clips, finishing nails, etc. The flag staff used cannot be wider than your figure's hand, as a general rule.
Take care in cutting out the flag. A very sharp scissors may be used for flags that are rectangular in shape, definitely on flags showing fringe, and use the x-acto on pennons, dove tails, and rounded corners. Once the flag is cut out, roll it around the flag staff to ensure fit and to make sure the edges match up. Trim any uneven edges.
To this point, I'm sure the steps have been followed countless times by gamers around the world, but maybe, from here on you'll find some useful tips. Before the flag is actually mounted, some folds must be made. Along the staff lines of the flag, the colored sides of the flag need to be folded back towards themselves. Pinch the folds to make sure they're sharp. The effect you're trying to achieve is one where the flag seals tightly around the flag staff. You don't want the traditional gap we've all seen where the flag looks like a piece of paper wrapped around a stick. We want the sheet to look like a flag.
Once you've finished the all important fold, apply a thin layer of white glue to the back of one side of the flag sheet, to include the part that will adhere to the staff. Spread the glue using the toothpick, wiping off any excess.
Wrap the flag around the staff and adjust the edges so everything is where you want it. As the glue makes the paper wet, the edges will begin to curl away from themselves. Just continue to press the edges together, wiping any excess glue as it is squeezed out, and soon they will stop curling and will remain together. At this point, you can shape the flag to give it the blowing-in-the-breeze look. Roll the soft flag carefully around a thick toothpick or similarly shaped object (paint brush handle). This helps to prevent unrealistic creases in your flags. All curves should be smooth. As you've shaped your flag, you may notice the edges might have curled slightly. Once again, simply press them back together.
Take one final look to ensure that the edges match up all the way around, excess beads of glue are wiped off, and the flag is still at the proper height on the staff. Set the flag aside to let it dry - best is about a day. Then spray seal the flag using a flat matte sealant. If you use a glossy sealer, this significantly enhances the brightness of the colors, but detracts from the realistic appearance of flag cloth.
Provided below is a checklist of steps:
- Prepare materials and work space: cutting tools, flag sheet, toothpick, napkin, glue, flag staff
- Cut flag
- Check fit
- Make creases and fold to fit staff
- Apply glue
- Attach to staff and press together
- Work out excess glue from staff to end / wipe off excess
- Wait -press curling edges back together
- Once edges have stopped curling, shape flag
- Final check that all edges match, no curling
- Final check of position on staff
- Let dry
- Spray Seal
And needless to say, the final step is to enjoy your figure for years of wargaming to come! The flags below are provided for practice, if you so desire. Repro and practice as many times as you need to.

Back to Rebel Yell No. 7 Table of Contents
Back to Rebel Yell List of Issues
Back to Master Magazine List
© Copyright 1997 by HMGS South
This article appears in MagWeb (Magazine Web) on the Internet World Wide Web.
Other military history articles and gaming articles are available at http://www.magweb.com