 Battle 1:
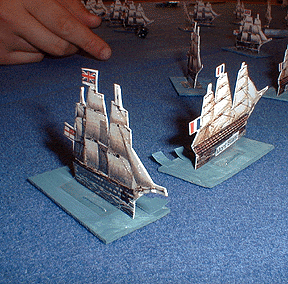
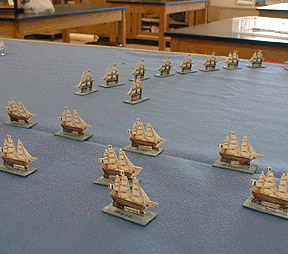
Prior to the start of the battle the Allied fleet captains deployed their ships in a wide, disorganized column rather than the orderly battle line their admiral had wanted. The British, on the other hand, were determined to carry out Admiral Nelson's orders. Their ships were arranged in two squadrons positioned to cut the Allied line. The battle began with the British making a perpendicular approach to the Allied line with the wind at their backs.
As the British moved into cannon range the Allies opened fire. The British sailed on into the teeth of their broadsides, with the flagships Victory and Royal Sovereign leading the way. The Victory, with Nelson himself at the helm, sailed for a gap in the line but was hit by a massive broadside from the Santissima-Trinidad at close range. One of the balls must have breached the magazine, for the Victory suddenly exploded in a shower of splinters and smoke.
The British captains leading the two columns were undaunted. They sailed on, determined to mix it up with the Allies and get revenge for the death of their revered commander. They hit the line with a vengeance, using their superior seamanship to maneuver into position to rake the hapless Allied ships again and again. One by one the Allied ships struck their colors and surrendered. The Allied ships at the front of the fleet wanted to reverse course and join the savage battle taking place behind them. Some attempted to take turn to port, but had difficulty tacking into the wind. Most of the ships took the easier but slower alternative and turned to starboard.
However the strange Allied formation turned out to have some advantages as it provided a sort of defense in depth. For the British it was like sticking their heads into a hornet's nest. They were taking fire from all directions as they weaved through the Allied ships. Meanwhile the ships at the back of the British squadeons were showing a strange reluctance to follow their comrades into the thick of the battle. One group sailed about aimlessly, the other turned and sailed parallel to the Allied line, trading fire with their opponents at long range. The lead British vessels were thus robbed of reinforcements precisely when they needed them the most. They continued to flail away at the Allied ships around them, but they were taking fearful casualties, and slowly they began surrendering. At one point the Belle Isle found itself fighting alone in the middle of the Allied fleet.
The battle ended and both sides
counted their losses. The British had won the engagement, but
barely. The Allies celebrated their performance, knowing they
done much better than their counterparts at the real battle. For
the British the loss of Nelson and their failure to win a decisive
victory could have dire consequences for the future of Britain.
 Battle 2:
In the second battle the British followed Nelson's plan to the letter. Both British squadrons hit the Allied line, decapitating it. While the head of the Allied line struggled to come about and join the fight it was harassed without mercy by the Africa, which successfully engaged and dispatched three Allied ships in quick succession. Farther back the British squadrons tore into the rest of the line, scattering the ships. The British captains made the most of their superiority, ruthlessly out maneuvering the Allies in a chaotic swirling melee and raking them with murderous fire.
As the Allied ships began surrendering in bunches they realized that they would not be able to win this battle. They were desperate to knock out at least one of the British ships, something the Allies were unable to do in the real battle. The captains of the Santa Anna and Heros teamed up on the Thunderer and forced her to strike her colors. Then the Algeciras delivered a devastating bow rake to the unfortunate Revenge, forcing her surrender. Tonnant and Mars were also defeated before the shattered remains of the Allied fleet gave up the battle and attempted to flee. This battle was a decisive British victory comparable to the historical outcome.
More Battle of Trafalgar 1805
Back to Table of Contents -- Junior General Report #3
Back to Junior General Report List of Issues
Back to MagWeb.com Magazine List
© Copyright 2003 by Matt Fritz.
This article appears in MagWeb.com (Magazine Web) on the Internet World Wide Web. Other articles covering military history and related topics are available at http://www.magweb.com