Creating a realistic battlefield on which to use all of those well paint wargaming figures eludes many wargamers. The games that seem to be most memorable from each wargaming convention are those with excellent terrain. With this article, I hope to provide few tips to create the perfect battlefield. I will describe a generic battlefield setup that I recently did.
1. Where to Start
Working with any size wargaming table, we must first have a good surface. Whether you use a piece of felt, a flocked piece of carpet, geo hex or terrain boards, many of the following methods will work for you. I will focus on using the non terrain board systems.
Felt - Many gamers use a green piece of felt that has been painted or just as is. This can be used with hills placed underneath or on the surface. Both methods work fine.
Flocked Carpet (my personal favorite) - A well flocked piece of indoor/outdoor carpet can provide an excellent base in which to start a game setup. The roads can either be permanently on the piece or "poured" later.
Geo-Hex - Geo hex can be set up to represent the desired battlefield. Geo-Hex can be a good setup choice for many gamers.
2. Streams/Roads and Large Hills
After we have decided on the surface covering, I suggest the placement of any large hills that are desired or needed on the battlefield. Then place the water (streams, rivers, creeks etc.) on your battlefield. Placement of the water now will allow for easier road and bridge placement. Next place any bridges desired on the field, followed by the main roads.
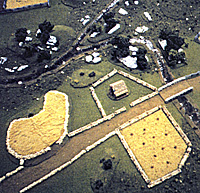 The early stage of a wooded area. Note the dark flocking used to denote the wooded area. The effects of fencing and the fields are already noticeable.
There are many commercial sources for streams and rivers available. A good looking stream is worth the price you may pay, or the effort to make, due to the ascetics it provides. If you do not have a good stream, use dark brown/black flocking to represent the water.
I also use flocking to create the roads on my tables. I use a combination of Woodland Scenics Soil and Earth Blends (all fine), to create the effect.
Flocking Tips - I place my flocking materials in shoe boxes and apply them with a small paper or plastic cup. I also keep a small Dustbuster charged to pick up the remains after a game, and place back in the shoe boxes. The materials can then be recycled. Also, some gamers I know, just roll up their felt cloth with the flocking grouped toward the center. The next time they use the cloth they unroll, and redistribute the flocking over the felt.
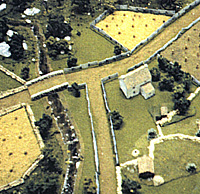 The battlefield is taking shape. Note the many small hills, outbuildings and use of trees placed along fences. Also note the orchard next to the large farmhouse.
3. Fields and Fences
Next comes the addition of fields to the landscape you have created. A collection of fields can be added for variety or to match a historical battlefield. Once again, these can be created at home, or purchased commercially. If you lack fields, try using Woodland Scenics flocking poured in the area you desire.
Once the fields and pastures are placed, we are ready to add fences. One can never have too much fence. Fence-in all of the fields, since 19th Century farmers were particular about keeping both domestic and wild animals out of their crops. Walls should also be added during this step.
4. Hills
Add all remaining hill pieces to you layout. (This step should be coordinated with step #3, since some fences and fields may be placed on the hills). I like to add small ridge lines, rocky areas, and medium sized hills throughout. Many very small hills can also be added to create the effect of rolling ground, and folds in the landscape. A little slope can make the difference when sighting the enemy, creating a unique battlefield situation.
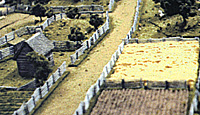 A bird's eye view down the battlefield. The effect of the many small ridges can be noted. Also, note the broken down fences along the fields (this is a battlefield after all.) Doesn't the wood look menacing?
5. Buildings
Now, I like to add my buildings. Place the buildings near the groupings of fields making allowances for roads, hills and such. Well painted buildings also add a lot to the overall effect of the scene.
6. Woods
I believe that good looking woods and trees make or break the effect on the game table. I have played around with many different methods but find myself most happy with the following. First, I take fine dark green flocking (this gets dirty through use) and sprinkle over the entire area for the woods, treeline (the effect leaves little question where the woods start and end). I then add trees (I mount my trees on individual fender washers) throughout the wooded area.
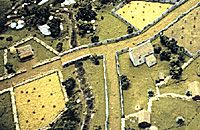 The battlefield has
now had the final touches added including the final flocking. Compare this with the previous pictures.
Large Terrain Photo (slow: 124K)
Next, I use a flocking mix of course dark green foliage, and rocks, and sprinkle the area of the woods. If you do not have enough trees to complete the effect, use Foliage Clusters (Woodland Scenics), torn into small pieces. I never use Lichen, because I think it does not look as good, and it is susceptible to disintegration during the winter heating season. The effect of the woods is superb using this approach.
7. Special Terrain Pieces
At this stage, or actually, through out the setup process, special terrain pieces can be added. I like to add small outbuildings around the farm and town scenes. I place them in the fence lines, which reduces the clutter a little. Also, haystacks and other items can be added. I also like to add orchards and extra trees along the fences, in fence corners and in the yards of the homes. The addition of trees in non forested areas looks very real.
I especially like to add outhouses, cemeteries and other eye catching items. Buildings can be mounted on small bases to add a permanent scene complete with water pumps, chopped wood etc. Check out the local model railroad shops for the little items that they sell.
8. Final Flocking
After we have placed all of our stuff on the battlefield, it looks pretty good doesn't it? I have found that one finishing touch that makes or breaks the battlefield is a final application of flocking. The final flocking includes adding extra roads, trails, and dirt areas around the buildings and outbuildings. I also like to add flocking to all areas that have been left green (non fields and woods).
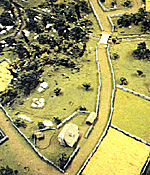 Flocking has been added in this view. Note the outhouse and use of outbuildings.
Due to all of the lines present when using Geo-Hex or the Carpet approach, lightly dusting the area with a light green flocking (coarse and fine) eliminate the effects of the lines. You can be deceived by this extra step, because your eye no longer catches the edges and lines present. Also, the effect is good since all pasture and grass areas have larger croppings of grass and weeds. The whole field is left with a mottled appearance that I like very much.
Well, that is it, a realistic looking battlefield. Unfortunately, this process takes extra time in both setup and takedown. The effect is worth the extra effort though. I will be contributing regular articles and will cover specific "how to" projects in upcoming issues. Feel free to give me your thoughts and ideas. Until next issue, good terraining!
Back to The Zouave Vol XII No. 2 Table of Contents
Back to The Zouave List of Issues
Back to Master Magazine List
© Copyright 1998 The American Civil War Society
This article appears in MagWeb (Magazine Web) on the Internet World Wide Web.
Other military history articles and gaming articles are available at http://www.magweb.com