
Background
A local hobby shop hosted an HMGS-PSW Gamesday and in support of that activity I volunteered to run the 1066 DBA Campaign featured in our illustrious Editor's publication, The Campaign for England, 1066 AD.
I assembled the armies (Norman, Anglo-Danish, Welsh, Viking and Pre-Feudal Scots), the terrain, and marked up the back of the counters of my Britannia game (used for all strategic movement) to reflect the leaders and cities listed. There are enough leaders, and hence armies, for 10 players (4 Saxons, 2 Norman, 2 Viking, 1 Scot and 1 Welsh). The towns range in point values from 300 for London and York down to 50 for places like Pevensey. Points are also scored for baltlefield victories. The game lasts 8 turns (August through September).
The Game
The game started with the Saxons cowering in their larger towns, the Scots in Edinburgh, the Vikings off the east coast, the Welsh in Wales and the Normans praying for favorable winds. On the first turn, unfavorable winds left the Normans stuck in France. The Scots moved on Durham and besieged the Saxons occupying the town. The Vikings landed in York, forcing the Saxon army there to retire into the town, and besieged unoccupied Lincoln. The Welsh crossed the border and set siege to Chester.
In those towns that had Saxon armies garrisoning them, the invaders were repulsed, but in every other siege, the invaders were successful in breaching the walls and capturing the towns. The Welsh pillaged Chester (gaining a random percentage of the town's value without having to hold it till games' end), establishing a pattern that they would repeat throughout the game.
 In turn two, the wind turned favorable for the Normans who landed and besieged Pevensy and
Winchester. The rapacious Welsh moved mto Leicester and the Scots to unoccupied Lancaster. The Vikings in York, looking for easier targets, also moved to Lancaster, precipitating the first
battle of the campaign.
In turn two, the wind turned favorable for the Normans who landed and besieged Pevensy and
Winchester. The rapacious Welsh moved mto Leicester and the Scots to unoccupied Lancaster. The Vikings in York, looking for easier targets, also moved to Lancaster, precipitating the first
battle of the campaign.
The Saxons still hid behind the walls of their towns, fearing contact with any of the invaders. In this first battle, the Scots had lost three elements and had only killed one in return, when suddenly a gap opened in the Viking battle line revealing the Viking commander. Some Scot warband hurtled through and killed him, ending the battle in a Scot victory! [Could there be anything less? editor in training]
The Scots then went on to besiege and capture Lancaster. The Normans captured Pevensy and Winchester and the Welsh continued to inspire fear throughout the countryside by pillaging Leicester.
On turn three, the remaining Viking army engaged the Saxons at York, the Normans besieged two Saxon armies in Exeter and Oxford, the Welsh moved onto Norwich, and the Scots moved back and besieged the Saxons in Durham. Every Saxon town was able to withstand the siege and the Saxon army in York scored a major victory against the lone remaining Viking army.
Saxons vs. Vikings
The battle started with the Viking army split into two bodies, one astride a road that led directly to the Saxon camp and the other facing the clumped Saxon army, which was setup quite some distance from it's camp. The Vikings on the road made a beeline straight for the Saxon camp. The Saxons, in desperation, threw one loose psiloi astride the road were it entered a wood. This psiloi killed the leading element of beserkers and tied up the entire Viking column long enough for the rest of the Saxon army to overwhelm the other body of Vikings facing them. This Saxon victory removed the Viking presence from England.
On turn four, the Saxons moved out of their towns rather than risk being captured by the continuing sieges. The Normans gave battle but the Scots had moved from Durham again, letting that Saxon army escape. Odo's Normans initially tried to flank the Saxon army by moving behind a long wood that went down the center of the battlefield but were stopped by the Saxon commander and huscarls who deployed in the gap between the wood and the table edge. This battle seesawed back and forth with the huscarls getting the better of it by killing one of the knight elements!
The Saxon fyrd continued to advance along the forest edge towards the Norman camp and the crossbow and psiloi defending it. When the Saxons advanced beyond the cover of the forest, the two elements of Norman knights who had been waiting on the flank of the forest pounced on the flank elements of Fyrd and eliminated them. This loss, coupled with the capture of the undefended Saxon camp earlier, gave the Normans the victory.
In the second battle between the Normans and Saxons, William's knights simply plowed straight into, the Saxon Fyrd eliminating enough to secure the victory, though at the cost of two elements of knights.
On turn 5, William moved onto Cambridge and Odo to Gloucester. The Saxons who had escaped from York also moved to Cambridge as well as the rampaging Welsh! It was determined that the Normans and Saxons would fight first with the victor then fighting the Welsh. The Saxon army had previously lost two elements of huscarls and the Normans two elements of knights. Once again, the Saxon fyrd proved incapable of standing up to the Norman knights and were ridden down.
Normans vs. Welsh
The victorious Normans, having lost yet another knight element in the previous battle, now faced the fresh Welsh. A river with forests running along it's length split the battlefield in two. The Norman army massed all the remaining troops, except for two stands of psiloi, on one side of the river. The Welsh split their army on both banks, one side containing all the archers, the other the spearmen.
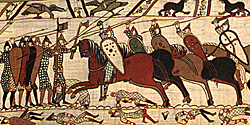
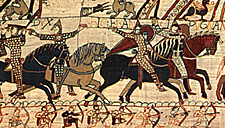 Illustration: Detail from the Bayeux Tapestry. William (far left) removes his helmet to end rumors of his death and rally his retreating troops. Eustace (next to William), carrying the papal banner, points out William.
William threw caution to the wind and charged everything straight ahead at the archers lined up against him. He placed his own crossbowmen and light horse on the flank and in front to draw as much bowfire away from the knights as possible and pushed his psiloi at the other Welsh flank to try and prevent them from redeploying across the bridge and onto the flank of the attacking Normans.
The Welsh did manage to get a couple of elements across the bridge and onto the flanks of the Norman crossbow. They destroyed a couple of elements but the Norman psiloi tied up the rest and even managed to kill one of the Welsh spearmen elements! The Norman light horse and remaining crossbow did their job, allowing William and his knights to close with the archers killing three elements and securing another stunning victory.
By turn 6, only four of the original 10 armies remained and the sole surviving Saxon army retreated to Dover. With the one remaining, a garrisoned Dover would not fall, so the Normans and Scots tried to capture as many towns as possible. Even with 4 victories and 4 towns in their possession, the Normans came in second to the Saxons!
Lessons Learned
First, knights kick butt! Using the 6 knight elements for the Normans really gave them battlefield superiority against the other armies in the campaign. It is probably more balanced (and historical) to force them to use the 3 Spear elements (dismounted knights/mercenary foot) rather than the 3 addibonal knight elements.
Second, 6 to 1 die roll combinations kill! The Viking player was a victim of this twice, with both being the deciding point in the game. From a campaign perspective, by simply holding London, York and Dover, the Saxons can score 800 points! To capture these big towns, especially if garrisoned, you essentially need to besiege them for the whole game to have a decent chance of taking them. This seems a bit skewed and I'm not sure how to address it.
The three ideas I have are to either:
-
a) reduce the value of the bigger towns
b) make York/London easier to capture or
c) score 100 points for battlefield victory and minus 50 for losing.
I personally prefer option c as this would reward fighting battles, and that is what this campaign is meant to do!
Another possible suggestion is to limit the number of turns a battle can take place with some penalty for not completing by then. There was one battle that took over an hour to fight! It was the only battle that turn and everyone else had to sit around and await the outcome. This is not good in a convention like setting, where you are trying for a fast-paced game that keeps everyone involved. Overall though, all the participants had a very good time and it served as an excellent introductory game as two of the participants had played a total of one DBA game between them and they turned out to be the winning side (damn Saxons)!
Rules Questions
A couple of rules questions came up during the campaign that I was hoping you could resolve.
- What is the point value for Leicester? It doesn't appear lo be listed.
- The rules slate that no army can end it's move in a highland area yet according to the map it looks as if Exeter is set up in a highland area, thus making sieges impossible, etc...? What about if two armies meet in a highland area (we were moving all armies one area at a time)?
- Can more than one army from the same faction occupy the same area? The DBA rules really don't allow for it but your campaign rules do allow for other armies to march onto the battlefield from the direction that they entered the area. What if the two armies start the turn in the same area, do you just allow for double/triple/quadrupled sized DBA armies?
Back to Saga #55 Table of Contents
© Copyright 1996 by Terry Gore
This article appears in MagWeb (Magazine Web) on the Internet World Wide Web.
Other military history articles and gaming articles are available at http://www.magweb.com