 For the last year or so I have had my miniature
armies in Spain fighting battles of the Peninsula
Campaign. My Spanish army might need some fixing.
Every time I command the Spanish they fight like the
worst army in Europe and when I go against them, I
think I am tangling with the British Guard. Maybe it's
just the general commanding them. No, that could not
be the problem!
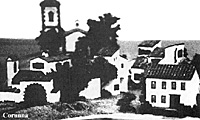
Having finished Talavera, I decided to try the battle of Corunna, January 16, 1809 in Northeast Spain. Corunna was not much of a battle, as Napoleonic battles go, but for some reason I liked the way the battlefield laid out and most important there were no Spanish at the battle!
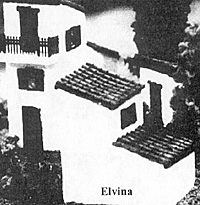
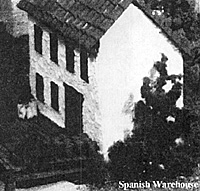
As part of my terrain set up I would have the city of Corunna. This was done using my town blocks made from 25mm Spanish Hovels buildings. Also needed was the village of Elvina. As I already had all the Hovel buildings put out for this era and location, I decided it might be fun to scratch build some Spanish buildings for the village of Elvina. I had seen articles in different magazines about doing this, it did not took real hard, and with the cost of the Hovels at $15-20 each there could be quite significant savings.
 To start with Elvina was going to be a hillside town with three buildings taking up a 9"x 9"
town block. The buildings would be fairly small, one would be 2"x 2" and two would be 2"x 4".
The buildings would range in height from one story to three story.
Construction began by purchasing a sheet of 1/4" foam board. I paid $4.00 for my sheet and could have obtained it for $2.00 if I had shopped around. This would be my only out of pocket expense for the buildings. With the sheet of foam board I could build 8 or 10 buildings easily. The walls for the buildings were cut from the foam board using an X-Acto knife. I then glued the walls together using Elmers white glue. I held the sides together with rubberbands while the wall structures dried.
The tile roofs were made using corrugated cardboard. I found a cardboard box that had the right size corrugations to look like tile. I then peeled off one side of the cardboard. These were then cut to size and glued to the roof The next step in making the tiles was to take cotton string and wet it with water. The string will be glued to the roof in rows to make the individual tiles. To do this I coated the whole roof with white glue. Then I would lay the cotton string along the roof using a paint brush with more glue and a small screwdriver to hold the string in place. The final step on the roof tiles is to coat the roof with dry wall compound. You can get this at a lumber store and it comes in smaller containers about one gallon in size. What I did was to dry brush the material down the slope of the roof. The material would catch on the string rows and ended up giving the look that the tiles overlapped.
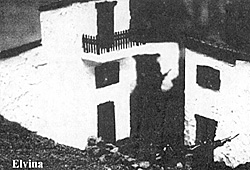
 The next step is to add doors, windows and balconies. The doors were made using small
pieces of strip balsa wood. A door frame was made and individual planks were glued in. For the
windows I had on hand a lot of small plastic windows left over from other projects. These were
glued on in various locations. You can also make the windows using balsa wood strips but it is a little more work. Most of the windows were given shutters. Pieces of balsa wood
were cut to size and glued next to the windows. For the balcony railing I had some ornamental
railing left over from another project and these were glued onto the balconies.
To make the wall stucco I used the drywall compound again. A paint brush was used to apply the compound and a larger brush was run over the compound when it dried a little, to give the stucco look. The rough building would now be done and ready for paint.
I found the best way to paint the building was to first prime the entire building using a black primer. The roofs were drybrushed with several coats of red oxide. After the roof dried I highlighted the raised sections by dry brushing a lighter red color and some white. Wall colors can be white or a sandstone. Both colors give a pleasant effect. Doors were done in brown with window frames being green or brown with green shutters. The actual window glass I painted by mixing navy blue paint with silver metallic paint. Small white streaks were them painted on the window to give the look of glass.
Elvina was suppose to be a village on a hillside with the building on different elevations. Styrofoam was cut and glued down. I then coated the hills with a rock putty mix. In the end I was not real happy on the way this turned out. I will do over at a later date. What I plan to do is put the buildings on a little larger board. Say a 10"x 10" size. This will give the little extra room that I needed. I will also make the different slopes in the town hills steeper. I further goofed when setting the buildings on the board. Each house was built with one wall that was solid with no doors and windows. The other three walls had lots of doors and windows. When I laid out the buildings it seems that the solid walls were all put to the outside making the nicer looking walls hard to see. I will reverse this when the buildings are remounted. The final detail items for the village was to add some stone walls and trees.
 In my rules I make these town blocks hard to capture. While casualties will not be great it
will usually take 3-5 turns to get a town block if you are lucky. It makes it possible to hold these built-up areas of the battlefield with a minimum amount of troops, no matter how many troops your opponent puts into the attack. As my ACW and Napoleonic rules are grand tactical in nature there is no need to have troops inside buildings. They are deployed anywhere inside the town block and cover all sides of the built up area.
A couple of ideas came up later that would make this type of project easier. Instead of gluing foamboard together for the sides of the walls you could cut the building out of a block of wood. This would take a table saw to gets things straight but it would be quick and the building would have a nice weight to it. I did find Spanish style roof tiles in several hobby stores. They come in plastic sheets costing $8.00 and would certainly speed up the building process. All different scales are available.
New Projects
I am still working on completing some of my 25mm ACW collection. This month I finished painting my figures from Firing Line Miniatures. They were painted them as Tyler's Brigade from the battle of Bull Run. I really wanted to use some of my Connecticut flags and this brigade had the 1st, 2nd and 3rd Connecticut in it. The figures painted up nicely. Each comes with a separate head which makes customizing the unit easy. The last I heard you can still get these figures from Steve Phillips at Firing line Miniatures 4761 N. Bear Canyon, Tucson, AZ 85749.
Back to MWAN #105 Table of Contents
Back to MWAN List of Issues
Back to MagWeb Magazine List
© Copyright 2000 Hal Thinglum
This article appears in MagWeb (Magazine Web) on the Internet World Wide Web.
Other military history articles and gaming articles are available at http://www.magweb.com