A new idea that I have been working on with both my American Civil War and Napoleonic rules has been the treatment and use of woods in the wargame. This idea came about as a result of a re-fight of the ACW battle of Shiloh. I had been working on a new rule set that was intended to provide for a quick regimental level ACW game. What I wanted were rules that would allow 2-4 players to fight the larger battles of the Civil War. The rules were to be paper less and give a battle that would look like a moving diorama.
One of the first battles that we fought as a play test was Shiloh. The rules played great and the speed of play, that is essential for a good game, was quite fast. In a little over three hours we did 21 turns. Not bad for rules that no one had seen prior to showing up for the game. I did have one disappointment in the game. It was not the rules but how the battlefield looked for the battle. The table set up, just did not look like Shiloh. Now I have never been to the Shiloh battlefield, but looking at any historical map shows that it was a heavily wooded area. My table representation lacked the effect of this wooded terrain. After the game I came to the conclusion that the way I represented woods and the rules for fighting in woods would have to change to get the visual effect that I wanted. What I decided to do was to make my model woods look realistic and worry about the wargame rules for woods later.
 Before getting into the construction of these new woods I would like to go over how I had been representing woods. This was typical of what you might see on most tables. My woods had been represented using various size boards painted dark brown with 6-18 trees on each board. The trees were removable to make it easier to get troops into the woods without doing damage to the figures. In my sawdust terrain system the boards were set into the terrain. The outline of the wooded area was clearly established and the system had worked great for many years. I guess, with my wargaming, I had come to the point where I wanted my terrain to look more realistic but still function within the rules.
What I decided to do was to keep the tree boards, but to add trees, so that the entire board was packed with trees. Thus the wooded area would look like a miniature forest when viewed either from above or from the side. The construction was quite simple, but did involve a lot of trees! I started with 1/2 particle board and made tree boards of various sizes. The smallest boards used are 5" x 9" while the largest are 18" x 24". The boards can have straight edges or curved edges depending on what looks best to you. I ended with boards that were square, rectangle, "L" shaped and curved.
A large assortment of shapes and sizes lets me set up any battlefield. If you game on a hard surface table, a thinner board would work and look better. Something like a tempered 1/4" hard board would work great. Once my boards were cut out to various sizes, I coated one side with grass material to give the board a rough texture. After this dried I painted the board on all sides using a dark olive drab paint. Previously I had painted my tree boards a dark brown but doing this project I found that the olive drab color added to the dark foreboding nature of how the woods would look. With the florescent lights shinning down on the trees, dark shadows were created making the woods look that much more realistic.
Now the boards were ready for the trees. Here I decided that I would use only the best trees readily available. I use two different brands that to me look very realistic. Most of my trees ended up being Woodland Scenic trees and I filled in with some Helki trees. Both of these are not cheap but they are of the same quality as my figures so it seemed logical to use them. The trees come with a quarter size base which I removed. This left a 3/16" peg at the bottom of the tree trunk. The trees come with brown plastic trunks. If you look close at a real tree you find most have a grayish brown trunk. What I did was dry brush some medium gray on the trunks. This was done using a 1" paint brush. It was quick and easy.
Then I drilled the tree board with holes at the various locations I wanted trees. Trees were glued onto the board using a hot glue gun. The trees were put on the board close enough to look like a typical forest canopy when viewed from above. As the trees were being glued in place, I also glued bushes around the "forest" using Woodland Scenic foliage clusters. These helped complete the look of the woods and made it even more difficult to see through the woods at ground level. When putting the trees on the board, I left a two inch zone free of trees around the edges of each board. The trees would hang over the edges of the boards, but there would be enough room to deploy troops on the edges of the wooded areas. Gaming in 25mm I decided to use trees that were 4" to 5" tall. This was tall enough to allow troops to be placed along the edge of the boards, but short enough to fit into plastic storage boxes when not in use.
When I started converting my tree boards over to the new style, one thing became quite clearit was going to take a very large quantity of trees to make up the necessary boards for my games. The Shiloh game had 36 tree boards on the table to represent the heavily wooded battle area. When I placed all of the trees for the new boards, I ended up with just five tree boards At that point it was apparent that I would have to find a cheaper way to make the trees or at least buy stock in the companies that manufacture them! The Woodland Scenic trees come either pre-assembled or you can buy a package of trunks and leaf material so that you can make your own.
The unassembled trees come 12 to a pack for usually around twelve dollars. I found that putting the trees together was not particularly hard and I saved a lot of money doing it myself. The plastic tree trunks are flat which requires you to twist and bend them so they become a useable tree armature. The leaf material comes in three colors with each package. Break the material apart and put each color into a shoe box. Glue the leaf material to the armature using contact cement. Liberally cover the branches of the tree with the cement, then roll the tree in the leaf material and then let dry. Your trees will look just like the pre-made trees but cost you about half of the normal price. You can further cut the price of individual trees by using a natural plant to make the armatures.
 The leaf material can be bought separately and is quite reasonable. The only plants that I
have found that make decent armatures are small hedge branches and sagebrush. If your are lucky
enough to live out in sage brush country you have a ready made supply. Don't try to buy it. They sell it in model train shops for $3.00 per armature! It, however, makes the most realistic looking trees possible.
Over the years I have put a lot of time into trying to make attractive wargaming terrain. The one thing that I have done, that has improved the look of my table the most, are these tree boards. My terrain went from what I would call, good looking wargame terrain to low level model railroad scenery with the addition of these wooded terrain boards. Now, when you look over the table, you see an aerial view much as would be seen from a balloon or airplane. At ground level you cannot see through the woods anymore.
As I started using the dense tree boards in my games, an unattended effect became apparent. The tree boards had a natural dead zone behind them that would prevent units close to a wooded area from being seen from the other side of the table. Units seem to become lost when behind the tree boards. After two or three turns it is easy to forget that a unit moved to that location and suddenly you move by the trees, to find later, that there is a unit on your flank, that you didn't know about or forgot about. The boards seem to increase the fog of war on the table in a natural way without additional rules.
When I constructed these tree boards I decided to leave the rules to the end and then try and figure ways to use them effectively in a game. The first thing that the boards changed was the idea that the wargame would take place in the center of the woods. By their construction, the fighting for an individual "block" of woods would revolve around the woods edges. This would fall nicely into place with my past wargaming experience. I do not know how may times I had attacked a woods line using the better part of a division to push back a small brigade. Then as I advanced through the woods there would be another brigade in the middle of the woods. Very frustrating, seeing as historically units absolutely did not like being held in reserve positions where they could not see what was happening.
More times than not, this type of reserve units would rout or fall back quite easily when confronted with advancing infantry. Without being able to physically place the units in the center of the woods this problem was solved without a lot of rules. Also my reading has led me to the conclusion that when troops fought in densely wooded terrain their officers had little or no control over what was happening. It seemed a logical conclusion, to forsake this part of the battle, and move forward to the areas where officers (players) actually had some control over the units.
 Below are the rules that I have been using to govern actions around wooded areas in my ACW
battles. The Napoleonic version is more restrictive regarding cavalry and artillery in woods. In the past the rules have been more detailed, but over time have been edited to keep things simple. The basic premises of the rules is to allow fighting around the edges of woods but to keep the battle from the center sections of a wooded area. Both my ACW rules and Napoleonic rules use alternate moves as part of the movement sequence and this is reflected in how the rules are implemented.
Wooded Terrain
Wooded areas can be represented by boards of various sizes with trees mounted on the boards to give the representation of a wooded area or the boards can be heavily covered with trees to give the realistic look of trees. Two inches around the edges of the boards should be left open for the deployment of troops. In the case of battles that were fought in heavily wooded areas the woods should be made of many tree boards set out so that there are various clearings separating distinct wooded areas. This allows players to defend and attack between clearings.
Basic Rules For Woods
Units may be deployed on the edges of woods within a two inch deployment zone. This deployment is limited to line formation. No deployment, for any unit, is allowed inside woods.
Only infantry in line formation may move through woods and this must be in a straight fine with no maneuvering allowed.
When infantry is moved forward into a wooded area and intends to move through the woods it should first stop, facing the woods, for the rest of the turn. Next turn the unit is moved through the woods to the other side. Units waiting to move through the woods are considered in the woods and may not be fired on or attacked.
In the case where movement through a woods contacts an enemy unit on the other side, the unit moving will gain the woods and the enemy unit will fall back 12"
In the case where movement through a woods by infantry contacts an enemy flank, the flanked unit(s) will fall back from the back edge of the woods 12" and the unit moving will gain the back edge of the woods.
Units that are forced by fire, morale or close combats to fall back through woods are considered routed.
New Projects
I have several new projects that I have been working on these past couple of months. A new Napoleonic battle was set up on the wargarne table. I have been in Spain re-fighting some of the Peninsular battles. I had just finished Talavera and my new action will be at Corunna. For that battle I needed a few more Spanish buildings. Four of these were built trying to duplicate the style and workmanship of the Hovels buildings that I already had. They turned out quite nice. They did not require much work and cost under $4.00 for all four buildings. Certainly better than the $15 to $25 that each of the Hovel buildings cost. One of my future columns will detail how these buildings were put together and finished.
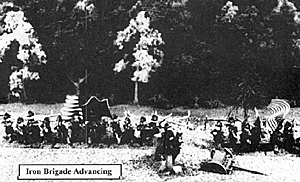
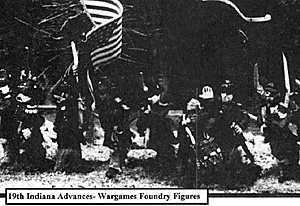
I have been doing some painting recently trying to get my ACW collection up to standard. While I have more than enough figures to do any ACW battle, I have been trying to complete at least one brigade from every manufacturer that has made 25nim figures. I have about eight manufactures to finish painting so that the collection is current. Most of what is left is either the "Cadallics" or the "Pintos" of the figures that have been produced. Left to be done are some Scruby, Wall and SAE figures, some of the very early figures. What I have been doing however, is some of the more recent figures, the Cadallics of what is available today. I just finished my Wargame Foundry figures. These were the first 25mm figures they put out in the regulation uniforms with frock coats and Hardee hats. I ended up painting them as the Iron Brigade at the battle of Antietam The figures have shoulder boards not worn by the unit but other wise make a good Iron brigade figure. A while back I received some sample figures from Wargames Foundry and a note that indicated that the new releases were much better than the initial offering of the line. Well I was quite happy with my figures and think they make a great wargame unit. They are very fun to paint with all the detail and the animation is excellent. I flagged the unit with my Antietam flags and was very pleased with the overall results.
The other figures that I have been painting are Redoubt. Without a doubt they are top line figures. The figures come with detachable heads and arms. This can make the figures kind of a pain to put together. On the other hand the variety and the animation is greatly improved this way. When I first started wargaming I was in 54mm, casting most of my own figures. To get the variety I needed, I casts the figures with a torso, separate arms and heads. It is amazing how many different figures one can put together this way.
Painting the Redoubt figures does take a little skill, with the main problem being all the detail that is put in these miniature wonders. When you do take time to paint this detail they turn out at great. These figures became Hood's Texas Brigade. The figures are available from the Miniature Service Center, 1525 Bridge St. Apt 163, Yuba City Ca. 95993
If you have any comments or questions feel free to E-mail me at Banasik@aol.com.
Back to MWAN #104 Table of Contents
Back to MWAN List of Issues
Back to MagWeb Magazine List
© Copyright 2000 Hal Thinglum
This article appears in MagWeb (Magazine Web) on the Internet World Wide Web.
Other military history articles and gaming articles are available at http://www.magweb.com