A lot has happened since my last column. I see that Hal had eye surgery and I ended up damaging my back on Memorial Day. Surgery followed and thankfully everything turned out OK. While waiting for surgery one of the few things I could do was a couple of turns each day, play testing my Napoleonic rules. It certainly was nice having a permanent wargame room for this activity. I remember a few issues back that Hal mentioned that he would really like to have a permanent set up but that MWAN takes over much of his space during the production of the magazine. This article is for Hal and saves me the time of writing a letter to Hal about my new wargame room. Hopefully the reader might find some interesting information that they can use when setting up a room for gaming.
I am certainly luckier than most gamers as I have been able to build from scratch two wargame rooms. Last year my wife and I decided to build a new house. My first "request" was that I get a wargame room at least the same size and scope as what I had. After years of watching my wargame activities, Sharon must have lost hope of reforming me as she readily agreed that the new house would have what ever size room that I needed.
Before going through the planning and building of the new room, I would like to talk a little about my old setup. What I found out while building my dream room was that the old one was much better than I thought and was very functional for a smaller house. In 1980 my war room started as an unfinished 26'x22' room, sharing space with the washer/dryer, furnace and hot water heater. Over the next year the walls and ceiling were finished. The room would be left open with half of the room used for wargaming. This area was finished with carpet. The other half of the room would become the workshop and laundry room. This floor area would be finished with vinyl covering. Base and upper cabinets were added in the workshop area along one and a half walls. Various storage cases and cabinets would be added to the wargame area, along with a 7' x14' table. I did not realize how functional this layout was until I started putting the new room together. What I actually had was three rooms in one and as long as you don't mind sharing, three very functional rooms. When it is time to do the laundry you have a large open room to layout and sort the clothes. When you had a work shop project, such as repairing a piece of furniture or building wargame terrain, there was plenty of room to lay stuff out. On wargame days everything would be cleaned up and put away. The washroom and workshop areas would serve nicely for staging the troops. I would soon find out how practical this set up was as the new house would have separate rooms for each but would expectantly add significantly to the construction cost.
Living in a cold weather area gives an advantage to a would be wargamer as almost all of the houses in these areas have a basement. This provides an added area that works well for a wargarne room. Our new house was to be a fairly large ranch which would provide ample area to construct the gaming room. With a basement location the first consideration was the entrance to the basement. It naturally would be a lot easier if people arriving for games did not have to walk through the main level of the house to get to the basement. The house design that we choose had a vestibule entrance at the front that turned into a very open foyer that let to the different areas of the house. Off the foyer was a stair case to the basement which took a forty-five degree turn as it goes down to the basement. The staircase is open with oak railing around it. This, we felt, would work perfectly for a short route from the front entrance to the basement.
In the basement we planned to have the wargarne room that would be 22' x 30'. Also there would be a large bedroom for my son Kevin and a downstairs bathroom. The next consideration was to keep the bedroom separate from the wargame room. I did not want people to walk through both to get to the other.
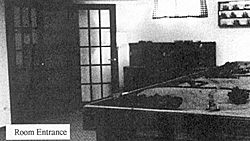
 Room Entrance
The solution ended up being a downstairs foyer that would be the entrance to all three rooms. This fit perfectly into the one thing that my new wargame room was going to have and that was double wide French doors for the entrance. I remember going to the Emperor's Headquarters after it first opened and seeing their wargame room with French doors and thinking how grand they looked. From that time on I said to myself , if I ever build another war room it would have French doors. The doors do have one practical side as when you are bringing supplies and equipment into the basement there is plenty of room to maneuver. Also I was going to try and set my room up in kind of a library setting or a den setting so the doors fit into that concept. The 10'xl2' foyer at the bottom of the stairs would become kind of an a sub room to the main room, becoming the home to several legal book cases that store much of my Civil War library.
The finishing of the room was provided by the contractor that build the home so the room would be ready as soon as we moved. For lighting the room, I went with eight fluorescent lights four feet long and two bulbs each. This really lights up the room and certainly make gaming more enjoyable when everything on the table can be seen without squinting. The lights were wired into two banks so you can turn on four or eight depending on how much light you wanted in the room. The one mistake that I made here was using commercial fixtures. A fluorescent light does put off a buzz and with eight lights there is quite a buzz. If there is activity everything is fine but when nothing is going on you can hear the buzz and it can get distracting. I found out later you can get fixtures that have specially built ballast that produce limited sound. In the future I will probably change out some of the ballasts. Fluorescent light can be set up with two types of bulbs. I use bright bulbs that give out a very bright but cool light. The other bulb would put a yellow fight that provides a very warm fight but one that is not as bright. These bulbs are also much more expensive, costing three or four times as much as the bright bulbs. Remember if you are taking photos under bright fluorescent light that everything will turn out green unless you use a fluorescent filter or a blue filter. The choice would come down to personal preference and financial considerations. My room does have a supplemental lighting system with incandescent light being provided by several floor lamps and desk lamps. These mostly get used when working in the room and not wanting to have things fit up like high noon.
My old wargame room had plush carpet on the floor. For this one I elected to go with a commercial carpet and pad. If you do a lot of gaming, a path can start forming around the table and the carpet will wear out sooner and have to be replaced. The commercial carpet does not cost any more and with the short nap it should last twice as long as your typical residential carpet.
 With the room done and ready to move into the real fims starts. For this new room I elected
to make a new wargame table and further decided that it would be much fancier than my original
table. So prior to moving, the old table was taken to the dump and given a last salute as it was disposed of The first order of business after moving and getting settled was to construct a new table. This one was going to be of pretty heavy construction. I did this mainly in case I had to change a light bulb I could stand on the table.
My original table was of much lighter construction as it was made to be portable. The table was made to be 6'x 14" and was constructed in three section. The center section was 6'x6" and the two end sections were CA". Framing was done with 2'x4" lumber which were screwed together using 3 1/2" drywall type screws. This is actually easier than using nails and makes the whole table much stronger. The top of the table was made using 1/2" particle board which also was screwed in but with the screws being counter sunk into the wood. For legs I wanted to have turned legs much like you would find on on antique dinning room table. I could not find any of these ready made so I ended up using baluster post. These would be the same product used to make staircases and are the end or comer pieces that the top rail attaches to. They come pre-made with turned centers and with each end a square 2 1/2" x 2 1/2". What I did was cut one of the square end off with a table saw. This made the baluster look like a table leg. The other square end had to be trimmed down so the leg would be 32" tall, which was the table height that I wanted. The legs were screwed to the framing using long drywalls screws. I used eight legs for the whole table. Four legs where attached to the center section. Two legs where attached to the outside table sections and then the outside sections where bolted to the center section.
As I use a "sawdust" terrain system for most games, the table needed sides. These were made from 1" x 8" pine boards. Six boards would make up the sides for the table. I wanted to make the table a little more attractive so I borrowed a router and curved the outer top edges of the table. I also routed into the side a couple of stripes which added to the finished product. The sides were attached using drywall screws, which were counter sunk into the side. When the table was moved and set up these holes where covered with woodworking "buttons" which fit into the hole and hid the screws. To finish the table I painted the top using a metallic blue paint. The inner sides of the table were done in a sky blue and the rest of the table was stained a medium oak color which matched the wood trim throughout the house. The final step to finish the table was to cover the entire table with 3 or 4 coats of a glossy polyuethene. This will protect the table for may years to come.
As with all wargamers, storage is always a consideration. To provide for additional storage capability I have used table skirts, so much of my accessories can be stored under the table. The table skirts were made using brown permanent press bed sheets. The sheets were cut up and edged. The top of the sheet was folded over and sewn together so a rod could fit through the skirt. The skirts were hung under the table using curtain springs and '4L" shaped hooks. This provides for skirts all around the table and covers up anything that is stored underneath the table. All of my scenery is store in plastic boxes as an added means of safety in case the basement would get any water in it.
Storing wargame figures and models is a another area I addressed. I just could not see putting the figures in boxes, out of sight, after all the work that goes into painting them. Therefore I worked on display cases so the majority of my collection could be stored in sight. I found by doing this you have a much better handle on what and how much you have. It is easy to forget and you just keep buying more figures. Also the display cases help keep me motivated and focused on my current projects. My display cases are of three types, floor cases, wall cases and table cases. VVhile these cases can be bought, they are expensive which led me to build my own. This was not a difficult project and with a little thought can be done quite easily. Discount lumbers stores have lumber already cut in most sizes that you might want.
My bigger floor cases are 3'x4'. They are made up using two boards 12" wide by four feet long for the top and bottom. The ends and middle support boards would be 12" wide by three long. These are screwed together using drywall screws. The boards can be stained and varnished as needed. A back for the case can be cut from 1/8" hard board and then painted white. The back can be screwed on again using drywall screws. Small legs can be purchased for the bottom which keep the case off the floor. For my cases I use glass shelving. It is a little more expensive but sure looks nice. I use 3/16" glass, having it cut to size and edged for safety. To hang the glass shelves you can buy metal strips that can be screwed into the sides of the case. The height of the shelves can then be adjusted to your wishes. For the front doors glass is again cut to size with a one inch overlap. Plastic or metal tracks can be purchased for the glass to slide open on. I have found that the plastic tracks seem to work better. For door handles you can check at a cabinet shop. They usually have metal handles much like you find on a sliding shower door. They can be attached to the doors and work great for opening and closing the doors. The wall and table top cases are built the same way but using smaller dimensions.
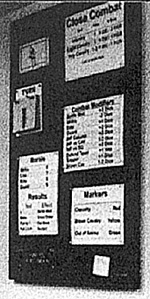
 One of the things I have been working on in my gaming has been for a paperless game. A
game that looks like a moving diorama. To this end my rules have become fairly simple. In the
room I mounted three bulletin boards on the wall. No hand held game charts are provided. Any
charts needed to play the game are on the bulletin board. The charts have been put in my
computer which makes producing the charts easy and changing the charts even easier. I also use
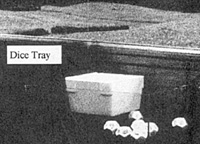
dice rolling trays to keep the table cleared. With the very smooth table sides I came up with a
new type of tray that is kind of interesting. Instead of using a tray with hooks that attach to the top of the table side, I started using suction cups to attach the tray to the table side. This is possible because the table sides are very smooth when the polyeuthene is used. The dice rollers are made using a clear plastic tray that is about 6"x7". Then attached to one side are three suction cups. You can find these in stores, usually with a clip on them for holding notes. Unscrew the clip, drill a small hole in the side of the tray and attach the suction cup. Each one of these can hold one pound. Three are more than enough to hold a tray up. You can then move them around as needed and they can be set up at what ever height you want. Smaller desk organizer trays are used to keep the dice in and they nicely attach to the side of the main tray.
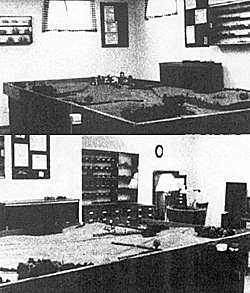
 Laying out the table was made much easier with the size of the room. I had enough room
to put the cases along the wall and still have three feet to walk around the table on two sides. The other two sides have open spaces around them which makes getting around very easy.
My cases also double as a place to put troops waiting to be committed to the battle or
leaving the battle. I did bring from my old house a large floor cabinet used for storing smaller wargaming pieces. This cabinet is three feet wide, three feet tall and six feet long. It has 48 drawers that are ideal for storing smaller scenery items and some miscellaneous figures. On top of this case I built a large wall type case that contains all of my Civil War artillery.
While my plan started out as a room dedicated to wargaming and nothing else, that was to change a little when we moved in. With the open design of the house it became apparent that there really was not a good place to put a second TV upstairs. So it did end up downstairs in the painting area. It is convenient when I do my painting.
New Flags
One nice thing about a column is the ability to plug my lastest flags. Following my surgery I had a little extra time and spent part of that working on some new flag sheets. One was the British Wars In India 1757-1826. This sheet has 14 flags and pennants. British 76th, 86th Foot, 78th Highlanders and 19th Light Dragoons. French Corps in service Tippoo Sahib, French Infantry Gerrard, East Indian standards, Bengali Standards, Standards of Mysore and Gurkha. Not really my period of interest, but I did have the research and the flags do took neat! For the English Civil War I did two new sheets ECW #5 and ECW #6. Both have 15 flags of Royalist Horse. Four new sheets were also done for The American Civil War line. ACW # 40 is New Jersey State flags. 10 national flags and 2 cavalry flags. ACW #41 is Connecticut State Flags. 7 National flags of different patterns. These will either have a star pattern in the canton or an eagle surrounded by stars in the canton. 5 Regimental flags of three different patterns are included. Some of the nicest looking Civil War flags. I don't have any Connecticut units in my army but will soon make some. Finally I completed two sheets for Bull Run. ACW #42 and #43. Each has eight flags, one sheet for the Union and the other Confederate.
Some of the flags for these sheets are quite interesting. Ellsworth Fire Zouaves (11th New York), a white flag with various fire equipment on it. The first Irish flag of the 69th New York, 1st Minnestoa. Lousiana Tigers, Hampton's Legion, VMI and Washington Artillery make up some of the flags on the Confederate sheet. Right now I am about half done with the ACW series. Lots more to do so I will just have to keep plugging along. By the way I am always looking for research on ACW brigades. If you have some good research on you favorite ACW brigade drop me a line and I'll try and produce it for you.
Odds and Ends
The other day when I was in a hobby shop I came across something interesting for the Wild West gamers. Microscale Decal has Western Town Signs in HO scale. They are # 87-164. There are 30-40 signs in various sizes, colors and shapes. They look great for finishing off a western town for some western skirmish gaming.
Back to MWAN #102 Table of Contents
Back to MWAN List of Issues
Back to MagWeb Magazine List
© Copyright 1999 Hal Thinglum
This article appears in MagWeb (Magazine Web) on the Internet World Wide Web.
Other military history articles and gaming articles are available at http://www.magweb.com