 Being an account of a solo wargame using Scenario 2 from "Scenarios for all Ages" by CS Grant and Stuart Asquith, CSG Publications (wargaming) 1996. ISBN 09525146 5 6.
There being a lull in reviewing and other varied activities of the pen and brush which I am wont to do, I set out the terrain as given in the map for Scenario 2. Any era could be battled in and I decided to use Wargames Foundry's "1644" rules which give a flowing uncomplicated game with the use of intention and order counters which obviate a lot of bookkeeping (now available through Guernsey Foundry).
The scenario is titled "Threat to the Flank" and, the authors say, is loosely based on the Battle of the Boyne. I decided to use my ECW/30YW figures for it, because they haven't been 'out' for a while, and I had just about enough of them to play the game.
Blue, the attacking force, has two groups of men. The main force consists of 6 units of infantry, two cavalry units and a battery of guns (one model + crew). My infantry regiments for this period consist of 8 musketeers in two groups of four either side a block of 6 or 8 pikemen. The regiment is commanded by a block of flag, drum, foot officer and sergeant. Most of the regiments have a mounted "colonel" too. Opposing them is Red Force which consists of two groups. The main one has 4 infantry units, one cavalry unit and a battery of guns. Their flanking force has 2 infantry units, 2 cavalry units and one battery of guns.
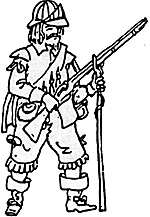
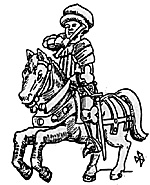
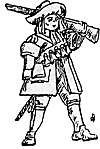
The foot figures are mostly Wargames Foundry or Redoubt Enterprises with some old 30YW Minifigs which, I think, still look the part. The cavalry are WGF or Redoubt except for two units - one each side. One is a cherished squadron of Stadden horse and the other a home-cast squadron of converted Prince August 25mm British Lifeguards made into Reiters. Their helmets cut down and swords bent round and painted up like long horse pistols (cut down a bit of course). My soft alloy allows various bends in arms, so they don't look too bad from a foot or so away!
I'll draw a picture of the wargames table, which is 5' x 8' and then draw it as a map in case you wish to play the game yourself.
Blue's task is to defeat Red and make him abandon his position and retreat south. Red's task is to defeat Blue and halt his advance south.
Blue's main force is at M. His flank force is at F. Red's main force is at D and his flank force is at R.
 Situation: Red has been alerted before the game starts to Blue's approach and has detached a force to go a.s.a.p. to the bridge, this force is at R. Red's main force at D is in depth, taking advantage of terrain. Blue's main force is poised to attack but has sent force F to take the bridge and attack Red in the flank. Blue must achieve his aim by nightfall. Red wins if he prevents Blue from advancing by nightfall. There is no draw position.
The Wargame
The good thing about solo gaming is that the game can go on for a long time if you have a space dedicated to it and your table can remain undisturbed for some days. A move or two one day and a move another and so on.
Red's flankers went for the bridge, the two infantry regiments having a "frame gun" each with them. They were accompanied by a medium cavalry regiment. The heavy cavalry regiment was ordered to stand fast by the commanding general. His idea being to use them as reserve, one packing a heavy punch. On the hill a Red regiment occupied the farm at the bottom and began to loophole the buildings. The artillery battery was drawn up to cover the river bank opposite. The other three regiments - a raw one between 2 trained disposed itself outside the village of Brauvogn on the slopes of the Brauberg overlooking the farm.
On the Blue side, two regiments of horse were riding hell for leather for the bridge followed, panting, by two infantry regiments and a battery of guns (one model) in limber straining to keep up. It was nail biting to see who would reach the bridge first. The rest of the Blue force moved forward on a wide front.
Two regiments of Scots mercenaries moved into the farm buildings 'complex' at the foot of the Brauberg. They went into the buildings and loopholed them to command the ford of the river Brau that was almost opposite. The main Blue force pushed forward 3 foot regiments and a gun to the ford and straight away came under fire from a battery just outside Brauvogn at least two contours higher up. A Red sniper was lurking in the farmyard but his classification was in doubt for several moves as he repeatedly failed to hit his chosen target.
Blue's first cavalry regiment thundered onto the bridge. The mounted arquebusiers followed up. They were stopped in their tracks by the two foot regiments and their frame guns and also a squadron of cavalry that eventually drove them back, meleed and beat them and caused the arquebusiers to turn and beat a retreat right off the board. After some volleys from two flanking Blue foot regiments there were not many of these brave horsemen left, but they had done their job.
 At the ford a Blue cannon unlimbered and did manage to do some damage to Reds opposing infantry and definitely caused Red's general to draw back his reserve of heavy cavalry. The ford was discovered to be wide enough for two foot regiments in column abreast. As Blue's brave infantry plunged into the water they were assailed by musketry from the farm and a dropping fire from the cannon on the Brauberg.
Blue's Whitecoats stood in the ford and were charged by Red's Scots mercenaries. Whitecoats were worn down and worn down but it was not until the last move of the game that the shattered remnants withdrew.
Every move Red's sniper fired and regularly missed and the frame gun too did not manage to do any execution until late on. However, the battery on the Brauberg continued to cause attrition in Blue's regiment at the ford. The Scots fired a volley and went to push of pike with the White regiment. Blue brought up a regiment of cavalry to try to force the ford but the persistent cannon on the hill shot away the front of their column until they were forced back.
At move 12 Red's sniper actually killed an opponent! On blue's right the gunners who had deserted their gun earlier screwed up their courage and returned, only to be set upon by cavalry enemies and run again!
The game ended on move 15 with Blue stalled all along the river line and having to push two foot regiments to his right in defence of that flank against marauding cavalry. So Red won in effect.
This game that began solo became a live opponent game as my friend Alasdair Jamison came for his yearly visit and took over Red generalship as it stood. He has played The Boyne several times from Blue's side and enjoyed switching roles to defend the hill (Brauberg) and village (Brauvogn). You have a go - Rick Priestly's rules are excellent and you'll enjoy using them.
The Battle of Brauvogn Large Map (slow: 116K)
The Battle of Brauvogn Jumbo Map (very slow: 217K)
Back to Table of Contents -- Lone Warrior #125
Back to Lone Warrior List of Issues
Back to MagWeb Magazine List
© Copyright 1999 by Solo Wargamers Association.
This article appears in MagWeb (Magazine Web) on the Internet World Wide Web.
Other military history articles and gaming articles are available at http://www.magweb.com
