 In this Article I am going to describe to you how I make terrain based on old compact disks. This article will focus on making an oasis project but, as it covers many of the basics of the technique, it is a good starting point for your own projects.
MATERIALS
Sand/Ballast
White/PVA Glue
Old Used CD
Small Stones
Air Drying Filler or Putty
Liquid Clear Gloss Varnish
Chestnut, Brown, and Blue Inks
To begin, you’ll want to clean the CD to remove any chemicals from the manufacturing process that might keep glue or paint from sticking. Like a miniature you can just clean it with soap and water. As CDs are obviously just a disk, you can just wipe it dry and begin the next step.
 Start to build the ground with a layer of sand or ballast put down with slightly watered down white glue to the shiny side of the CD. This is to give later layers a bit of grit to stick to. You will want to cover the hole at this time with card stock. As the surface of the disk is so smooth the glue will pool so you will want to divide it into sections and work fast. Get used to waiting for this to dry between steps, an hour usually.
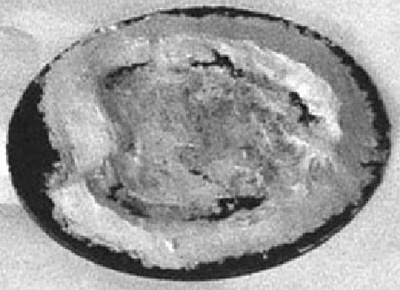
Second Filler Layer Complete.
Create a ring of filler or putty around the base in any shape you want. After this layer is dry take some more filler and go around the outside edge of the shape creating a slope. This is all to give the terrain piece some extra height for interest and create a retaining wall for the water. An option for a more shallow body of water is to just skip to the next step and make a ring of stones for the retaining wall.
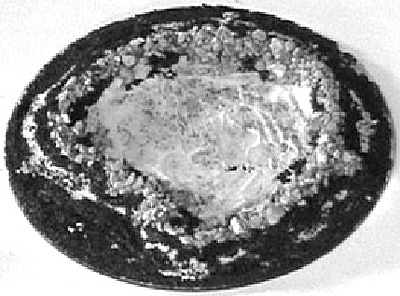
Glue small stones (I used model railroad talus) around the top and inner slope of the ring shape, making sure to plug any holes resulting from odd shaped stones. For a bit more texture on the base you may want to glue down more stones singularly and in small clumps around the base. Another layer of sand on the outer slope of the ring helps it to blend with the ground texture of the base. Also at this point I put a smoothed layer of filler at the bottom of the ring to represent the mud/silt at the bottom of the oasis.
 Details Finished, Ready For Primer Coat.
Once all this is dry you can go ahead a prime the whole piece. I tend to prime black and do a lot of dry brushing so you may well have a different approach to painting the piece. I started with a layer of ‘nutmeg’ acrylic paint over the entire base, and followed up with a heavy dry brush of ‘maple sugar tan’. Some areas of ‘nutmeg’ were painted here and there for visual interest. Then the whole base was given a dry brush of the ‘maple sugar tan’ mixed with white for a final highlight.
Clumps of static grass in a medium or dark green were spread around the base for some simple vegetation. Then the base is varnished. You want to do that before the water is applied as you don’t want to run the risk of frosting it over.
The kind of gloss varnish I use is produced by Delta Ceramcoat, and it or similar varieties can be found in craft or department stores. The only problem with it is that the time it takes to dry increases exponentially in relation to how thick you put it on, and in some nooks and crannies it doesn’t always dry clear. Now this is something to watch out for, and you may want to use another method for water. I like it however, because even dry it has a tendency to absorb inks allowing any number of neat effects.
To begin the creation of the water, you’ll want to make a couple of thin (no more than 1mm or 1/16") layers of the varnish. Waiting until it dries clear before applying another layer. After applying two layers you’ll want to add some inks to give the water some color and add to the impression of depth. Make a narrow band of the chestnut ink around the edges with the blue in the center, and since the inks will take some time to dry take the opportunity to blend the two colors where they meet for a more natural gradient.
 Add two or three more layers of the varnish, again allowing plenty of time to dry. When you are satisfied with the depth the final layer you add should be mixed with just a couple of drops of brown or chestnut ink to make a muddy effect and again add some depth. And you’re finished.
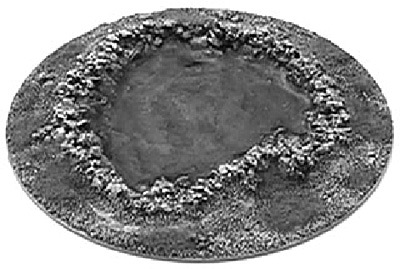
Finished Project
CD based terrain tend to be fast projects and well suited to the terrain details important enough to need to be made but not large enough or used often enough to be etched into a modular terrain system piece. It also works well in creating low profiled things like swamps and patches of rough terrain so they can be stacked for easy storage. Lots of different projects can be done.
Back to The Heliograph # 145 Table of Contents
Back to The Heliograph List of Issues
Back to Master Magazine List
© Copyright 2004 by Richard Brooks.
This article appears in MagWeb.com (Magazine Web) on the Internet World Wide Web.
Other articles from military history and related magazines are available at http://www.magweb.com