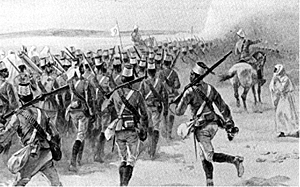
"Volley Fire!"
Victorian Colonial Era
Wargame Rules For The Audacious
By Larry V. Brom
By Larry V. Brom
|
||||||||||||||||||||||||||||||||||||||||||||||||||||||||||||||||||||||||||||||||||||||||||||||||||||||||||||||||||||||||||||||||||
| MOVE DISTANCES The below number of D6 are rolled to determine distance in inches | |||
|---|---|---|---|
| Unit | LINE | COLUMN/SCOUTS | SQUARE |
| Sudanese Units | Three D6 | Four D6 | Two D6 |
| British Cavalry | Five D6 | Six D6 | NA |
| British Guns | Three D6 (deployed) | Four D6 (limbered) | Two D6 |
| Dervish Foot | Always Move Four D6 | ||
| Dervish Horse | Always Move Six D6 | ||
| Mounted Leaders | Always Move Five D6 | ||
A. Sudanese/British move by units, measuring from the front center of their present formation to the front center of their new formation in their new location.
B. Dervish groups move by measuring from the front center of their mass to their new location Dervish groups (no formations-just mass) can interpenetrate each other with no effect to either.
C. Sudanese/British units can move through friendly units with no disruption but their move distance is cut in half (round up).
D. Sub units or groups can be amalgamated to move as one group or unit under one leader.
A. All Sudanese infantry, guns, and all mounted troops move one-half the above stated distances when moving through rough terrain, and across walls, ditches, fences, and fordable water. Dervish foot take no such terrain penalty nor do mounted leaders (Round all fractions up).
B. Sudanese units can make a double time move by rolling two D6 for each unit so doing. The resultant number is the additional inches that unit can add to it's normal move distance that phase. The low die rolled, however, is the number of casualties down from "heat stroke" - mark as such. If "doubles" are rolled there are no such casualties. British units can do the same but the high die is the number of casualties from heat stroke.
C. British units with no leaders attached, and Dervish groups with no leader within 24", roll one less movement die than the Table specifies .
A. Sudanese/British units can choose up to 3 figures as "scouts" who move independently from their unit.
B. See movement table for distances. Scouts cannot double time. Scouts take no terrain penalty.
C. Scouts move, call visibility, exchange fire, and then fight hand-to-hand, if applicable.
D. Scouts fire in a 45' arc to their facing direction. Roll D6's. 4,5,6 hits in open. 5, 6 hits in cover.
E. Scouts can attempt to evade fire and melee' combat by rolling three D6. An even number, they can move away that distance, an odd number and they stand in place, surprised.
A. Move five D6 and take no terrain penalty.
B. Cannot be fired upon and have a bonus in melee' combat.
C. Pistols hit with 6's only in all cases. Point blank roll 6 D6, deadly range roll 4 D6, and close roll 2 D6.
A. Get a bonus in melee' combat.
B. Can be in any hollow formation with the sides as equal as possible.
C. Can have guns at the corners or in any side.
D. Cannot initiate any melee's and cannot support other melee's.
 CONCEALMENT
Cover is woods, scrub, gullies, ravines, embankments, etc., and buildings.
A. All concealment must be defined at the commencement of the game.
B. Visibility distance is the full table except into cover when the viewer must be 6" away and can only see 6" into and must call for "visibility". Concealed troops must be at the edge of any cover to fire out and they will then be exposed.
C. No firing into concealment unless a target is visible.
D. Small arms firing range into and inside woods and scrub, etc., is 24". Gun range is 36".
E. Visibility into cover from the edge of is 12".
A. To enter, must spend one turn halted outside - fire at 1/2 hit result (round up) while so doing.
B. Troops inside take less casualties from fire and get a bonus in melee' combat, but cannot support outside melee's.
C. To leave a building move out 12" in any direction from the center of same and form and face in any direction in any formation.
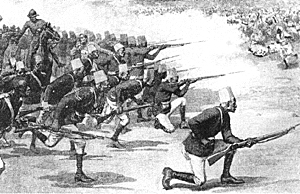 INFANTRY FIRE
A. Fire is simultaneous in a 45 degree cone from the facing direction of the firer. Fire by units or groups.
B. Sudanese and Dervish riflemen can only fire the front two ranks of any formation. Dervish spears can throw overhead with all figures in range (arc of fire for spears is 45').
C. For rifles or guns to fire overhead the target must be further from any "obstacle" than the firer, and the target or firer must be elevated.
D. TO FIRE; Point out the target, measure to determine how many figures are in range, then consult the Firing Table to see how many hits are inflicted. Roll one 20-sided die for each 13 to 20 figures firing or each 7 to 15 cavalrymen.
E. Hits equal the number of men down in the target unit.
F. The number of hits inflicted may never exceed the number of men firing
G. 12 or less infantry or 6 or less cavalry use regular numbers, but only inflict half effect.
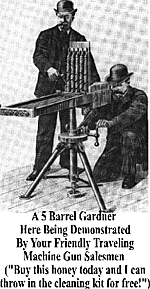 GARDNER GUN FIRE
A. Guns fire in a 45 degree cone from their facing direction.
B. Deployed guns can move one D6 and fire that turn. Guns that limber or unlimber (in place), cannot fire the turn that they do so.
C. To self-destroy a gun, announce same prior to any melee, If a 6 is rolled on a D6, cannot do so.
D. If a gun crew loses a melee they rout to their direct rear, disordered, the gun stays in place. Guns that are abandoned, crewless, or captured can be manned by infantry or Dervish foot but, always fire as if target is in cover.
E. It takes two "hits" to mark one gunner as a casualty.
F. TO FIRE; Point out target and measure range. Roll one 20-sided die and consult Firing Table to determine how many hits are inflicted on the target unit. Two gunners or less manning a gun always fire as if target is in cover
G. Gun jams if a 20 is rolled on the firing die. Gun and crew fall back 12" to clear the jam (will not leave building or square), and does not fire that turn.
| Firing Table | |||
|---|---|---|---|
| Unit | Point Blank | Deadly | Close |
| Sudanese Rifles Single rank | 1-12 | 1-10 | 1-8 |
| Sudanese Rifles Double rank | 1-14 | 1-12 | 1-10 |
| Mounted Carbines | 1-8 | 1-6 | 1-4 |
| Dervish Rifles | 1-10 | 1-8 | 1-6 |
| Dervish Spears | 1-8 | NA | NA |
| Gardner Gun | 1-14 | 1-12 | 1-10 |
| All Pistols (6s hit, 1-5 miss | 6d6 | 4d6 | 2d6 |
A. Targets in cover take 1/2 hits from firing table results - round fractions up.
B. Mark casualties by laying them down on the table in place.
C. 1's and 2's on the firing die are always hits on key figures (dervish riflemen and gunners), if applicable in a mixed target group. If a separate target group is all key figures, normal hit numbers pertain.
D. Anytime a unit or group takes fire casualties roll a D20. If a 20 is rolled that units officer, emir, NCO, or standard bearer is one of the casualties. Die rolls determine which leader.
E. If either COMMANDER is in a zone of fire roll an additional D20. A 20 and the leader is killed, a 19 and the leader took a minor wound.
| WEAPON RANGES Drastic reduction in visibility and range due to sun glare and dust (Ground Scale Ratio; 1 Foot = 25 yds, 12 feet = 300 yds) | |||
|---|---|---|---|
| Unit | Point Blank Range | Deadly Range | Close Range |
| Sudanese Rifles | 0 to 4 ft | 4 to 8 ft | 8 to 12 ft |
| Mounted Carbines | 0 to 3 ft | 3 to 6 ft | 6 to 9 ft |
| Dervish Rifles | 0 to 3 ft | 3 to 6 ft | 6 to 9 ft |
| Dervish Spears | 0 to 2 ft | NA | NA |
| British Pistols | 0 to 1 ft | 1 to 2 ft | 2 to 3 ft |
| Gardner Gun | 0 to 5 ft | 5 to 10 ft | 10 ft & over |
 HAND-TO-HAND COMBAT
A. The attacker announces a charge (before rolling the movement dice), points out the target, and rolls his movement dice. He then measures which figures will make contact with the enemy unit or mass. All that do, will fight in the melee'. The attacker will close in on the target halting 1" away and take any and all defensive fire as he closes in. The attacker cannot fire as he closes into combat.
B. Any defending figures within 6" of the initially contacted figures are considered support and will fight in the melee'.
C. The melee' will be fought figure-to-figure between the opponents in the order in which the units made contact. Officers/Emirs are the last to fight. The figures are paired and each combatant will roll one D6 with Modifiers (see Table). The highest total is the winner of that individual fight and that figure stays in the melee. The loser, with a 2, 3, 4, 5,or 6 on his die temporarily falls to the rear of the fight. If the loss was with a 1 on the die, that figure is marked as a casualty. If the attacker hit from the rear, a 1 or 2 marks the loser as a casualty -- other numbers to the rear.
D. When one side or the other has all it's figures forced out of the melee' area that side is the loser and the melee' is concluded. The loser falls back a six D6 distance directly away from the fight and is now SHAKEN. Loser effect no friendly units in their path, but are captured if they collide with organized enemy forces. If this fall back takes the losing force to the table edge, roll a D6 for direction along that edge. Fall back direction is perpendicular to the front facing of the winner. E. The winner of the melee can reform and or reface on the objective, or move one normal move distance and reface and reform. Winner cannot use this bonus move to initiate another melee'.
MELEE MODIFIERS
(Add or subtract from the D6 die roll)
 SHAKEN UNITS OR GROUPS
(Losers of melee' combat)
A. Regroup on the next turn unless they roll a 5 or 6 on a D6, in which case they are still shaken.
B. Always fire as if their target is "In Cover", fight melee's w/penalty, cannot initiate melee's.
C. Can move through friendly units with no ramifications to either.
D. All move a two D6 distance until they regroup.
(Neither British nor Dervish cavalry can fight dismounted)
In this time and place it was considered - by cavalrymen - a decided disadvantage to be in combat on foot!!!
MORALE TESTING
When a Force reaches less than 50% of its' starting strength, morale must be tested each turn. Roll one D10 and read chart below for results. If both Forces are testing morale , roll low die for who tests first - if this test fails, other Force need not test!!
| Nationality | Die Roll | Result |
|---|---|---|
| SUDANESE | 5, 6, 7, 8, 9, 10 | Morale holds, carry on the fight. |
| 2, 3, 4 | Force routs from the table leaving all guns. | |
| 1 | Disaster, force is annihilated. Officers captured, humiliated, and placed in cages for public view!! | |
| DERVISH | 6, 7, 8, 9, 10 | Morale holds, carry on the fight. |
| 3, 4, 5 | Force routs from the table - game ends. | |
| 1, 2 | Leaders kill themselves, tribesmen throw down all their weapons and surrender!! |
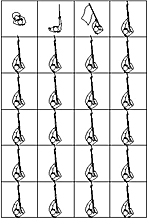
Lines
[One Rank Line]
![]()
[Two Rank Line]

[Cavalry Line]

Field Columns
|
|
|
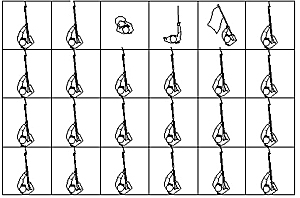
|
| Road Columns | Square | |
|---|---|---|
|
|
|
|

|

| |
(Players are reminded the following tables are only suggestions and that variations are perfectly permissable.)
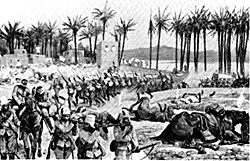
SUDANESE BRITISH FORCE
Major Stevens, Commanding
Ninth Sudanese Infantry No. 1 Company
Ninth Hussars 'A' Troop: Cpt. Carr, Sr.
DERVISH HADENDOWA FORCE
Osman Azrak & Flagbearer Commanding
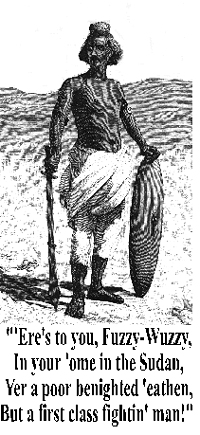
Hadendowa Tribesmen (Fuzzie Wuzzies)
Mounted Emir & Flagbearer
Dervish Tribesmen
Mounted Emir & Flagbearer
Mounted Emir & Flagbearer
 Introduction
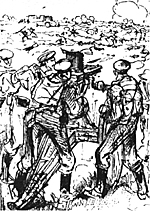 GAME PREPARATION