Woods On Disks!
Terrain Technique
by Philip J. Viverito
| |
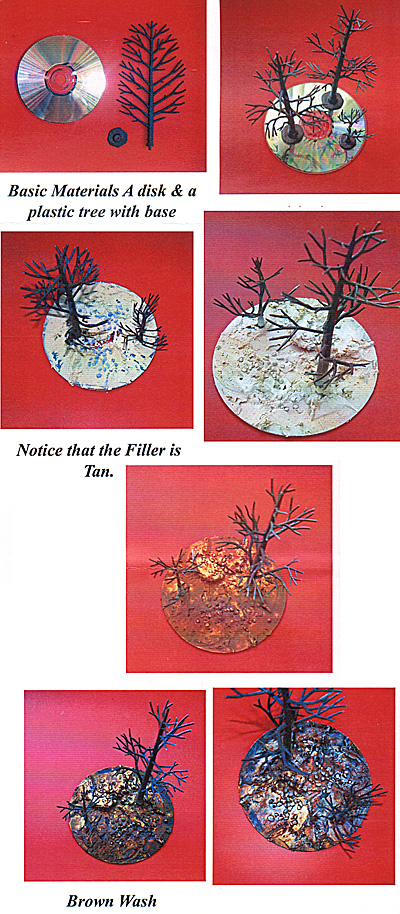
While in Augusta I was discussing terrain features with one of the game masters, I think it was Drew. I explained some of my terrain techniques and in the process I learned at least one thing in the exchange of ideas. It was a small thing and I guess you might say I could not see the forest for the trees or in this case it was for the disks. So I guess disk on me. When mentioning that I was out of basing materials the master told me to use disks or DVD's for basing trees. So here is a great way to use up all those AOL disks you get in the mail. To make your own great looking woods start by buying a bag of trees at any hobby store. These run about $14.00 to $24.00 depending on the size. The disks you can get anywhere and usually free. Start using these two items: A tree with its base and a disk. Basic Materials: A disk and a plastic tree with base The next thing you will need is plastic glue. Quick Grab works well for this ($2.95). Assemble the base to the tree and then glue the based tree onto the disk. You can do up to three trees per base. More than three trees is not recommended as the disk becomes cluttered. With the trees affixed to the disk you will now need some Elmers Plastic Wood Filler which can be purchased at any hard ware store. Do not use spackling as this will not hold up well. Wood fill is a plastic and will dry hard while spackling is soft and chalky. Trowel it on with a putty knife. Now sprinkle unused kitty litter in spots and let dry for an hour. Press the litter into the plastic fill. When the filler has dried spray paint carefully around the base of the tree with white enamel. This is not necessary but I like the look and it fixes the kitty litter to the filler. When troweling the wood fill make it lumpy to look like rough ground.With the stand primed in white paint the ground tan or light brown. I use acrylic paint. Paint this on blotchy, making high lights of light and dark. Let the paint dry for a half hour or so. Do not put this in the oven to dry as the disk will warp. Brown Wash When dry use a chocolate brown acrylic paint and wash the tan base. This wash will make more high lights. Now dry brush the stand with lighter colors like white or dust colors. This accentuates the kitty litter and makes the litter look like real stones.
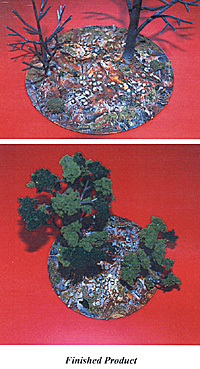
Adding grass is simple. Paint parts of the base with Elmers white glue and then sprinkle grass flocking and clumps of flocking for bushes. The work is not done until the trees have their leaves added. The bags of trees come with large clumps of flocking and to finish the job just paint glue either plastic or white Elmers and stretch the clumps from branch to branch. When using the based trees I like to sprinkle loose flocking round the bases when I set up my scenario. This really makes things look seamless. You can see the trees I have done at Cold Wars this April 9, 2005 A.D. Back to Table of Contents -- Classical Hack Newsletter # 8 Back to Classical Hack Newsletter List of Issues Back to MagWeb Master Magazine List © Copyright 2005 by Phil Viverito. This article appears in MagWeb.com (Magazine Web) on the Internet World Wide Web. Other articles from military history and related magazines are available at http://www.magweb.com |

 The final step to finishing the stand is to add flocking or grass. Grass or flocking can be found at most hobby shops.