 Blue Max is a fun, fast paced, and
excellent multiplayer WWI aerial combat
game. Players will find Blue Max simple and
straight forward to play with simple
concepts that are easy to grasp for the
firsttime gamer. This combination of
simplicity and smooth game flow makes the
game perfect for large scale gaming for
beginner and veteran gamers alike (our
biggest game to date is 20+ players).
The game can be played using any kind of cardboard counter or miniature on a hex based map, but in my experiences with WW1 gamin, (Blue Max or otherwise), I've noticed that most gamers prefer the 1/72 models for their aerial combat games. So the topic of this article is to explain how we make flight stands to be use with our 1/72 models for Blue Max.
The main goal here is to lay down a standard for everyone to follow so that we can avoid the problems faced when players try to use flight stands of different heights and styles.
There are two main parts to the flight stands we use, the base and the five section telescoping antenna. The bases can be made from almost anything, but I find that wood bases work best. The easiest bases to make are ones that are square and these should measure 3 to 3.5 inches by 3 to 3.5 inches with a thickness of about 0.75 of an inch. If you want to add a little weight to your base for use with heavier models, try adding a few extra washers or better yet, you can even try curving out hollow sections in the bottom of the base and adding lead weights.
The antennas that we use can be found at any Radio Shack store. Look for 15 and 1/4 inch five section antennas with part number 270-1406A or 270-1406B. Attach the antenna to the center of the base using a screw, but make sure the screw head is flush with the bottom of the base by counter sinking the screw.
I highly recommend that you use small hole washers at the base of the antenna and at the bottom of the stand, again making sure the washer and screw does not protrude out. The quick way to affix the antenna to the base would be to use a 2 inch nail with the same diameter as the threaded hole at the bottom of the antenna.
Hammer the nail through the bottom of the base and epoxy the antenna to the nail. If you don't get the nail straight, it will cause problems. Also, using this method makes it impossible to take down the stand or replace the antenna if it gets damaged or destroyed.
Attaching your plane model to the antenna can be done in several ways. Most people seem to prefer the tube method by attaching a small metal tube to the bottom of the plane model. The tube method makes it very easy to bank the plane and more versatile for use in other games.
Attach the tube to a cleaned surface (devoid of paint) of the plane using a good epoxy like Deveon's Plastic Steel or something similar. You might be tempted to use crazy glue, but don't, the tube will only break off after a few hours of use. The inner diameter of the tube and the thickness of the wire we use to support our models is 0.062 or 1/16th of an inch (almost 2mm).
Cut this tubing to a length of about 1.0 inch and for smaller planes or surfaces try 0.75 of an inch. Don't go any smaller then .60 of an inch for tube lengths. Wire can be cut to any. useable length. I recommend using metal tubing and wire. Using brass or copper wire with aluminum or brass tubing works the best.
I find that if you epoxy a tube to the side of the end piece which is at the end of the 'antenna you can make the wire removable and multipurpose. This works really well for planes that have no tubes attached. You can make some sort of clip-on device by epoxying a padded alligator clip (or other type) onto a section of tubing to be used with a wire. This can then be used with any antenna that has a tube attached to it.
 Helpful Tips:
1) Now after you do all this simple work and you discover that your plane flip flops on the wire, you can perform this really easy fix to give it a snug fit. Take a pair of pliers and put a small (don't over do it) bend in the middle of the wire so that there is a little resistance exerted on the inside of the tube. If the tube and wire are already a close fit, it doesn't take much. In some cases you can't even see the bend in the wire.
2) Sometimes when you get an antenna, the little brass fitting that is crimped onto the bottom of it is a little loose. Instead of trying to crimp it tighter, use a little crazy glue to make it snug. Do this by applying a drop of crazy glue in the crack. You can work the glue in by moving the two pieces a little but then straighten the pieces and let it dry.
3) There is more then one way to make flight stands. Todd Pressley came up with a fast and simple way by drilling a hole about 0.25 to 0.30 of an inch deep into the base using a drill bit that has the same diameter as the bottom of the antenna. Then by using a fair amount of good epoxy, he affixed the antenna to the wood base.
If you would like to see samples of these flight stands or have any questions, please don't hesitate to ask questions. I will be more then willing to help out. I hope this article helps you daring pilots out there to step up and become Aces and heroes of the skies. The nice thing about areo combat during the Great War is that you can get started with just a few planes. One plane for early war (1915-16), one for mid war (1917) and one for late war (1918). The year 1917 being the most common.
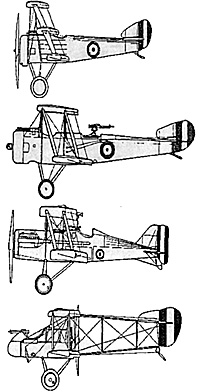
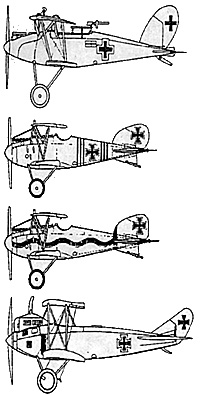
Illustrations: Sopwith Snipe and Sopwith Pup (slow: 120K)
Back to Dispatch December 2002 Table of Contents
Back to Dispatch List of Issues
Back to MagWeb Master Magazine List
© Copyright 2002 by HMGS Mid-South
This article appears in MagWeb (Magazine Web) on the Internet World Wide Web. Other military history articles and gaming articles are available at http://www.magweb.com