Steps:
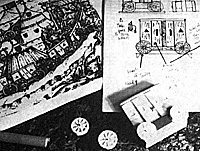
Getting "realistic-looking buildings from the period point of view"
such as a "Portuguese windmill or a Hussite wagon-fort" requires
research. However, any war gamer can begin to do basic historical research
by looking in books. Books may come from the library or from your friends.
Add the notes and sketches you have made from the books to take home and
reflect on and dream on. Begin to build your own library of books, scrapbooks
and file folders of clippings from magazines and newspapers. For example,
Hal Foster's Prince Valiant is one of the best.
Similar benefits apply to the photos you may have taken or sketches you may have made on visits to conventions, museums and historic places. Remember that to make your
own sketch, however rough, you must really look closely at Fort Ticonderoga,
Valley Forge or the Henry house at Bull Run. That sketch becomes the access-key
to detailed memories of the place stored in the wonderful historical database
we keep behind our eyes. When you begin making working notes and sketches you must consider "scale",
not necessarily in the precise sense of the scale modeler, but in the "look
of the thing" sense of the stage model." Vertical and horizontal scale
are handled differently. The figures must "go with" the approximate
vertical scale doors and windows. Many buildings and related equipment
will fit figures between the 15mm and the 25mm scale, but not with the
6 mm or the 54 mm sizes.
A Matter of Scale
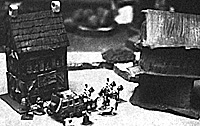
In Napoleonic Wargaming, Charles Grant gives a good guideline for horizontal scale. If we use a 10 yards = 1 inch horizontal scale then a house on a 3" x 5" base, with a "garrison" of no more than six figures, represents a built up area of 30 x 50 yards
held by 120 soldiers. This could represent a small farmstead and three
such structures represent a small village.
While Grant made hollow box houses, many with removable roofs, and actually placed figures inside them, my plaster castings are solid. I have successfully placed the troops off-table
by using maps and "rosters" in areas designated to represent
the houses. This adds to the "fog of war" as the player must
"scout it out" or risk a deadly volley from ambush. The larger the figures, 25/30 mm or 15 mm, scales, the more detail can
be shown on the buildings and equipment. With the 1/300 scale the entire
village could be cast as a single unit. Finally, would-be handcrafters must have the courage to be lousy. You
must be willing to start with rough buildings and then work up from poor,
to average and eventually, to pretty good! Often people say to themselves
with "the voice of the turtle"- if I can do it isn't really much
account. So they never try to begin the work that would have steadily improved
their skills.
Materials may include wood (balsa, pine, 1/8" and 1/4" plywood); cardboard
(corrugated, art board, bristol board, and cereal boxes); plastic (milk
jugs and blister packs); paper (brown paper sack, bond paper and even napkins
and paper towels. Children's modeling clay, which doesn't harden, artist's
clay like DAS, which does, and Sculpy modeling compound which is baked
to harden. Many of these materials, even when hardened with paint, will
not stand up to wargaming, but when transformed into plaster castings by
using latex molds, sealed and painted they will last for years. I have
labeled and dated many of my vintage structures underneath the base. Some
readers may recall the "Fox and Hedgehog Inn" at Badajoz or the
"Great Redoubt" at Guemmenburg.
Make separate molds for basic roofs, gables, and chimneys. You can start with the log, stone,
or timbered building blocks and add a variety of roofs: Shingle roofs,
tile roofs made of corrugated cardboard or strings, and of course, thatched
roofs. Gluing the strips of cardboard shingles, or brushing modeling clay
to produce the look of thatch may take time, but you are making a mold
that will cast a number of roofs, hedges, or heavy doors with hinges, remember
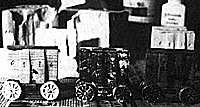
"the first one may take two hours, the rest take ten minutes." Wagons and other equipment can be made in latex molds if we give up
separate "wheels that turn". Use a solid block for the wagon
bed and area under the wagon (it will be painted black and be virtually
invisible) with the wheels glued onto the pattern.
I made wheels for the wagons and wagon-fort in the pictures by rolling a ball of modeling compound about 1/2" diameter, flattened out to 1/4" thickness, made a
wooden pattern for the triangular spaces between the hub, rim and spokes,
pressed it lightly into the disks to create the spokes, and finally, baked
the wheels (following the directions on the box). Then I glued them onto
the wagon pattern and filled in the cracks with white glue and modeling
clay to avoid any deep undercuts in the latex mold.
Stone Walls
Stone wall patterns can be made out of balls or blocks of modeling clay.
Combine clay with match sticks to create patterns for fence-rows with vegetation,
even vineyards (I made the grapes out of tiny beads). When you have finished your pattern mount it on a base of heavy cardboard
(corrugated cardboard is good and strong) to allow a generous (1 to 2 inches)
latex "lip" around the pattern. This lip serves to hold the mold
suspended in place while you pour the plaster in, more on this later. My "palisade unit" for DBA camps and field fortifications,
such as the Romans built every night, was built on a wooden block. The
earth ramp in front and the individual "logs" were made of Sculpy
modeling compound. I rolled each log on a flat surface, cut them to length
as if an axe had been used, used a nail point to scribe "bark lines"
on the sides and then mounted them into a groove in the base. Then the
whole thing was baked to harden it.
Before applying the latex I painted white glue over the palisade to fill in the small cracks, for bigger ones I used modeling clay. Since these units should be given a black primer,
the depth of the crack will look the same, but the plaster will release
more easily from the shallower groove. Latex rubber is sold at many craft and hobby shops-model railroaders
use it too. It comes in different colors. Red White and Blue all seem to
work equally well. I buy a pint (16 oz.) at a time. From the last pint
I have made the molds for a hut, two wagons, a tent, and, at last, a Hussite
"wagon-fort". These five molds used about 4-5 ounces.
I prepare my patterns by brushing on a couple of coats of "tincture of green
soap" (buy it at a pharmacy). When it is dry, brush on the latex like
paint using a small brush (#6 or 1/4" wide). Prepare the brush by
working up a lather on a cake of soap. The soapy water will coat the bristles.
Wipe the lather out. Then dip into the latex and brush out the thin-coat.
Work it carefully into the details of the pattern. Dip the brush into plain
water to thin the first coat as needed. Blow gently on the surface to eliminate
small bubbles.
The cardboard base gives you something to hold onto. Extend
the latex at least an inch onto the base to create a support to hold the
mold when you pour the plaster in. Be sure to wash the brush to dissolve
the latex emulsion in soapy water IMMEDIATELY so the rubber does not harden
in the bristles! Pay particular attention to the bristles by the metal
ferrule that joins it to the handle. As the latex emulsion dries it changes color. Wait until it is dry before
putting on the next coat(s). How many coats of latex? It depends on the
size of the pattern and the potential weight of the plaster casting. I
use about 6 coats for the 25mm scale things. Read the directions for your
latex. I paint on one coat after breakfast and one before bed. When I have
finished and the last coat is dry I shake talcum power over the top surfaces
and brush it lightly to remove the stickiness and keep the mold from sticking
to itself when you peel it off the pattern. You need a mold with the thickness and flexibility of a heavy rubber
glove. If the mold is too thin, it may tear when you gently peel it back
(as you would a rubber glove) and remove it from the pattern. The weight
of a lot of wet plaster will make a thinner mold bulge out. If the mold
is too thick it won't bulge out, but may break pieces off when you try
to reverse it and peel it off either the pattern or the casting. Follow this basic procedure for making castings in latex mold I have
described and making the "stone-molds described below to support the
larger latex molds. 1. Fill the mold with water and pour it into a flexible plastic mixing
container. I have made a good one out of the bottom of a anti-freeze container.
Do not wash the leftover plaster into the drain to harden in the trap.
Let it harden in the mixing bowl and then flex the bowl to break it. Pour
the pieces into the trash. 2. Sprinkle the plaster-of-paris or special craft casting material into
the water, until the plaster mountain emerges from the water. let it set
to absorb the water for several minutes. If you bought the plaster in a
box with directions instead of in a paper sack, read the directions! I
mix it gently so as to release the air bubbles from the mix. Try not to
stir more air into the mix.
When it begins to thicken, about like pancake batter, spoon it into the mold. Tap the mold to set up tiny vibrations that will release the bubbles to the surface. Let it set to harden. The
time seems to depend on the plaster, and the temperature. With many plasters the "setting-up" releases heat and the mold will grow warm to the touch.
When it begins to cool down you can test the hardness with a finger nail and if it is hard-remove the rubber mold from the plaster support mold, if you are using one, and then peel back the rubber mold from your house, roof, or wagon. I have some molds still usable after twenty years. Store your latex rubber molds as you would computer disks ..carefully.
The outer "lip" you made when brushing the latex
onto the pattern should support it while you pour the plaster in. However,
for houses and larger castings the weight of the rubber may cause the mold
to bulge out. When I made the tent I made an additional outer mold to prevent
this. Jack Scruby called it a "Stone Mold". This rough outer
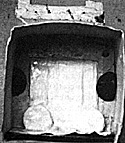
mold supports the rubber when it is filled with plaster. In making the tent I constructed the basic pattern out of a small cardboard
box adding the tent flap, tent ropes and stakes, and decorative ruffles.
I mounted it on a base and carefully painted the latex on it, not forgetting
the supporting lip. When this was finished, I took the supporting pattern
out of the mold, checked it, then carefully fitted it back into the latex.
Then I made a two-piece plaster mold using a cardboard carton for a mold.
I brushed on a lubricating coating of tincture of green soap on the mold
and base. I then mixed plaster, as described below, and poured the bottom
half of the "stone mold". Next I inserted the latex mold and
its base half-way (measured and marked before) into the carton and let
it harden.
Then I placed a thumb-sized piece of modeling clay on each side
of the mold (to make it easier to open the finished mold after removing
the carton) pressed it snugly in place, and brushed a lubricating coat
of green soap over the entire surface of the latex and plaster pieces.
Finally I mixed and poured the top half of the "stone mold".
When everything had hardened, I cut open the carton removed the block of
plaster, removed the clay thumb pieces and eased the plaster blocks apart.
Then I removed the cardboard base and gently eased the pattern out of the
rubber mold. To make a tent, I place the rubber into the front half of
the mold (mark it) add the back. fasten it with rubber bands and mix and
pour the plaster for tent, or house. Smooth off the base with an old file or a "Sureform" tool.
(This works like a plane except the holes in the replaceable blade make
dozens of little cutting edges. Warning! smoothing plaster will spoil it
for fine wood work. I keep a blade just for shaping plaster bases.) Additional
details can be carved/ scratched/engraved into the plaster to "customize"
them.
Two versions of a building before and during a battle - can be made
from the same mold with battle-scars added to the fresh plaster casting
before it is completely hardened. Charles Grant shows this "before
and after" effect in The War Game (p.101). I have one mold that makes
only a fire-blackened foundation of a basic first story. Plaster has a lovely textured surface for water-based washes. I use
acrylic paints thinned down with water and applied with a large water color
brush (perhaps a No.6 ?). Good effects- shadows on eaves, windows, and
doorways- can be made by using different darker colors for a second or
third stain after the first one has dried. This technique uses sprayed or painted black undercoat primer, then
white "dry brush" painting of the highlights, (so you can see
the details) followed by painting colors on the highlighted areas. The
white "highlighting" allows more brilliant color of the highlights
shading off into the shadowed areas of black. Staining washes may also
be used over the highlighted areas. A final technique adds texture and gives a more realistic look to buildings
and equipment. Put the article to be treated into a large corrugated spray
paint box and then give it a very light "fogging" with flat black
spray paint. If you don't use black spray primer, the same light "fogging"
with black can be done by using an old toothbrush. Put a little black paint
on a flat surface and pick it up with the ends of the bristles.
Then, with the bristles up and the brush pointed at the article to be "fogged",
pull back over the bristles with a wooden match stick. As the bristles
snap forward they will send spattering flecks of black paint onto the article.
This will produce spots and specks of varied sizes. Practice on pieces
of paper or cardboard before using it on your building. I tried this for
the first time on the buildings, including that Portuguese windmill, that
I built for the "Busaco" battle in Fort Wayne in 1965. Istill
use them. Untreated plaster can absorb smoke, dust and grime over the years of
setting up, wargaming, and storing. A coat of clear varnish protects the
model from dust and smudges from sweaty handling. There are many kinds
of varnish, which can buy in quarts, pints or ounces. Your choice depends
on how much surface you have to cover and your basic preference between
oil and water based varnishes.
I like the craft shop water-based varnish sold in small 2 oz. containers. I often use three or four drops of black paint-per fluid oz. to give a slight staining/weathering effect. Mix in
a small jar like those used for baby food. The black tends to settle out
so don't forget to stir before applying to your model. The thin dark lines
pick out details more delicately than I can paint them. If you prefer a
more realistic effect follow up with a dull coat spray. This also allow
the selective use of gloss varnish for windows, signs, water in puddles
or buckets etc... Mounting on a heavy card board or thin wood base protects the edge of
the plaster casting from chipping. It also helps blend the structure with
the war game table or diorama base. Using white glue, you can add foliage,
chests, buckets, flagstones. Birdcage stone can be used for road gravel
or painted green to represent grass.
Remember that grass is seldom all the same shade of green. Blend several shades of green using the "multiple wash" technique. When green(s) are dry, mix a thin black wash. Let
it run down onto the base, creating shadows, then mix light yellow-green paint and drybrush the tops of the "grass clumps". This also works well for special figure bases, and command stands. John Gillingham, The War of the Roses, Louisiana State University Press: Baton
Rouge, p.110-111 (baggage train and fortified camp).
Back to Creating Custom Casting
RESEARCH
MAKING THE PATTERNS
 If only one item is needed, scratch building may be the answer, but
when a number of wagons, tents, vineyards, entrenchments or houses are
needed this plaster casting technique comes into its own as a real labor-saver.
The patterns are developed using the research and the decisions on scale.
Use squared graph paper to make your working drawings to size.
 Houses, inns, stables and other structures are composed of basic boxes.
Make houses in components (separate first and second stories, roofs, sheds)
and then "mix and match" to custom-make villages and farmyards.
Don't make the details too delicate or they won't cast in plaster. You
can add the drain pipes, rain barrels, and porch steps and railings later
when you "customize" the basic components.
 The supply wagon frame was made of cardboard strips glued onto the basic block. The top was paper napkin soaked with white glue, draped over a couple of pieces of wood and
left to harden. Tie-down ropes were cotton string coated with white glue,
stretched over the top and "tied down" on the sides.
The supply wagon frame was made of cardboard strips glued onto the basic block. The top was paper napkin soaked with white glue, draped over a couple of pieces of wood and
left to harden. Tie-down ropes were cotton string coated with white glue,
stretched over the top and "tied down" on the sides.MAKING THE LATEX MOLDS
MIXING THE PLASTER AND POURING
PREPARING THE MOLD
 The small molds such as the palisade and the wagons need only a support
collar of corrugated cardboard to support them while the mold is filled
and the plaster hardens. I use a shoe box and cut a piece of corrugated
cardboard to reach over the edges with an inch to spare. Cut out an opening
just big enough for the mold to slide down inside the collar and hang inside
the shoe box.
THE PLASTER OUTER "STONE MOLDS"
PREPARING THE CASTINGS FOR PAINTING
PAINTING
"STAIN-PAINTING" WITH WASHES
"HIGHLIGHT PAINTING"
"ADDING BLACK FOGGING"
VARNISHING FOR PROTECTION.
MOUNTING ON BASES
REFERENCES
Charles Grant, The War Game, St Martin's Press, 1971 pp. 101-110 (buildings
and damage).
Charles Grant, Napoleonic Wargaming, Argus Books Ltd., 1975 p. 128-29
(buildings and horizontal scale).
Richard Humble, Warfare in the Middle Ages, Brompton Books 1989, p.
161 (Hussite wagenburgs).
Lynn Montross, War Tbrough the Ages, Harper and Bros., New York 1944,
p. 187-89 (Hussite wagon-fort).
Jack Scruby, Making Military Miniatures in Rubber Molds p.6.
Back to Table of Contents -- Courier #63
Back to Courier List of Issues
Back to Master Magazine List
© Copyright 1993 by The Courier Publishing Company.
This article appears in MagWeb (Magazine Web) on the Internet World Wide Web.
Other military history articles and gaming articles are available at http://www.magweb.com