 BACKGROUND
Mortimer's Cross is one of the lesser known battles of the Wars of the Roses. This is partly because the details of the engagement are hard to come by, but also because it is often regarded, not entirely accurately, as something of a side-show, fought on the remote Welsh Marches, away from the main theatre of conflict.
Even at the time, understandably enough, attention was focussed on the sweep south by Queen Margaret's terrifying Lancastrian hordes from Scotland and the North of England, whilst in later years the eventual winners of the Wars, the House of Tudor, were understandably inclined to play down the significance of a battle which had been a disaster for their family.
As a result, Mortimer's Cross is remembered, if indeed at all, mainly for the phenomenon of the "parhelion", or image of three suns, which was seen in the sky on the morning before the battle, and the traveller, unless pausing for refreshment at the Mortimer's Cross Inn, or with a sharp eye for wayside monuments, is unlikely to realise that he is crossing the site of the battle which obtained for Edward, Duke of York, the title of King Edward IV of England.
In the 1450's, when war broke out, much of Richard, the then Duke of York's, wealth and military power lay in his lands on the central Welsh Marches, centred on the strongholds of Wigmore and Ludlow.
The Welsh Marches were a good source of men with military experience, and among York's chief supporters were three Welsh brothers, sons of William ap Thomas, steward of the York estates, and his wife, Gwladys, daughter of the Davy Gam who is known to fame as "Fluelin" in Shakespeare's "Henry V". The most prominent of the brothers was Sir William Herbert, a veteran of the French Wars, who was to be Edward's second-incommand at Mortimer's Cross. Other prominent Yorkist supporters were the Deveraux family of Wigmore and Sir Richard Croft of Croft Castle.
During the 1450's the Welsh Border saw considerable disorder and skirmishing between Yorkist supporters led by the Herberts and the Lancastrians under Jasper Tudor, Earl of Pembroke.
It is interesting, and no doubt added to its bitterness, that this new conflict found ancestral enemies facing each other once again. During the Glyn Dwr Revolt of half a century earlier, Herbert's grandfather, Davy Gam, had fought for King Henry IV, whilst the Tudors, and their supporters the Scudamores, had been related to and fought for Owain Glyn Dwr.
THE CAMPAIGN
On July 10th, 1460, at the battle of Northampton, the spasmodic fighting which had so far characterised the struggle between Lancaster and York took a more decisive turn when the Yorkists captured King Henry VI. The Lancastrians, now under the tiger-like leadership of Queen Margaret, plotted revenge. Their counter-attack was to be two-pronged. From Pembroke in SouthWest Wales, Jasper Tudor, his Welsh levies strengthened by French mercenaries and Irish clansmen under James Butler, Earl of Wiltshire and Ormonde, was to thrust into the Yorkist heartlands along the Welsh Border. Meanwhile Margaret would launch an offensive from the North.
Richard, Duke of York, now officially acting as Protector of England in the name of the captive King, reacted to the threat with haste bordering on suicidal rashness. He swallowed the bait which the Lancastrians had possibly deliberately laid when they ravaged the Duke's estates in West Yorkshire, and hurried north with such men as he could muster, leaving the Earl of Warwick to hold London, and Edward, his eldest son, to defend the family estates on the Welsh Marches.
On December 30th, Richard made his final fatal blunder. Sallying out of Sandal Castle, near Wakefield, against the much larger Lancastrian forces of the Duke of Somerset and the Earl of Northumberland, he was defeated and killed. He had finally gained the crown he had sought, albeit only a paper one, placed derisively on his head, which was spiked above Micklegate Bar in York.
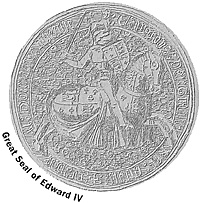
Richard's death left Edward both as the new Duke of York and Yorkist claimant to the throne of England. Though not yet 19, Edward was already known for his height, strength, charm and generosity. Though these qualities themselves counted for much in a medieval commander, his military ability was yet to be fully tested.
Edward was probably at Shrewsbury when news of the disaster at Wakefield reached him, and he knew that he would have to face the threat from Jasper Tudor without support from elsewhere.
Shrewsbury proved to be luke-warm in its support for Edward, and he fell back into the Yorkist lands, probably to his main stronghold at Ludlow. In any battle fought in its vicinity, the new Duke of York knew both the country and the men who would be fighting there for him. And in his lieutenants, especially the Herberts and the Deveraux, Edward had commanders who knew every inch of the ground over which the battle with Jasper Tudor would be fought.
 Edward had probably begun preparations to meet the threat from Wales even before he heard of his father's death, for he had to secure his base in the Welsh Marches before marching to the support of Yorkist forces elsewhere. Back in Ludlow, Edward and his men had the considerable advantage of being able to sit out the harsh wintery conditions in comfort whilst awaiting news of enemy movements.
Perhaps Jasper Tudor had hoped to coordinate his advance with the Queen's thrust from the North, but Lancastrian plans may have been thrown off course by Richard of York's rash actions. The Earl of Wiltshire seems to have been present at Wakefield, and the delay which ensued before he arrived to take command of the reinforcements from Ireland, and possibly of the contingent of mercenaries hired from France and Brittany, may have been the reason that the Earl of Pembroke did not take the field until about January 20th.
Jasper Tudor's aim was to gather as much support as possible from SouthWest Wales, and his forces almost / certainly marched up the Towy Valley to Llandovery, then to Trecastle, on through Brecon, which was in Lancastrian hands, and then along the north bank of the Wye into Herefordshire.
Marching then via Sarnesfield and Woebley, the Lancastrian army headed for Leominster, their objective to attack Ludlow and Wigmore, and serve out to Edward the same treatment suffered by his father at Wakefield.
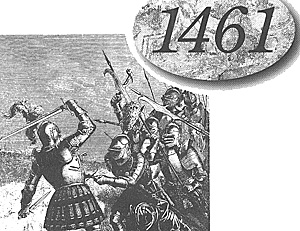
On the night of February 2nd, the Lancastrian army bivouacked in its laager of waggons just over a mile south of the road junction at Mortimer's Cross. Ahead of them, in the narrow neck of low ground between the hills and the River Lugg, Edward's forces were drawn up to offer battle.
THE ARMIES
Contemporary chroniclers make their usual wildly conflicting estimates of the numbers of troops engaged at Mortimer's Cross. One source credits the Yorkists with 50,000 men! In reality, neither army is likely to have mustered more than 3,000 men at most.
The Yorkist army consisted almost entirely of men from the southern Marches of Wales, at least 2,000 troops in all. Among a number of Shropshire and Herefordshire gentry with Edward were Richard and William Herbert (the latter acting as secondin-command, and possibly as Edward's military mentor), Walter Deveraux and Sir Richard Croft of Croft Castle, whose estate bordered the battlefield. It is possible that the Yorkist army had a somewhat higher proportion of experienced troops than their opponents did.
The Lancastrian army may have been larger than Edward's, but it was far less cohesive, one problem being that its contingents between them may have spoken no less than five languages! The best of its troops may perhaps have been the Welsh soldiers of the Tudors and Scudamores. The Irish were ferocious fighters, but lacked both training and suitable equipment. The French and Breton mercenaries may have been experienced, but probably had no great commitment.
A few words should be said concerning the arms and equipment of the combatants. In general there was a great preponderance of longbowmen among the foot - on occasion the ratio was 8:1 or more. The basic units forming the armies of the Wars of the Roses were the ;ontingents provided by the great nobles. Most troops were raised by the indenture system, by which the King subcontracted to leading nobility and professional captains the job of providing armed men. The most powerful magnates often mustered several thousand men wearing their personal liveries.
The elite troops were the personal household companies of the great lords. Foremost among these were the household archers, the Earl of Warwick estimating that one of these was worth two ordinary archers. They were sometimes paid at the same rate as a household knight, and provided with the best available equipment. Both York and the Earl of Pembroke may be expected to have included contingents of such troops in their armies.
The smaller landowners and yeomen were usually compelled for reasons of selfpreservation to enter into contracts known as "livery and maintainance" with the great nobles, and to agree to fight alongside them in time of need in return for their protection at other times. They would not be paid, and would have to bring along with them a specified number of armed followers. Those commanders who could afford them would also possibly raise contingents of mercenary troops, frequently from abroad.
In some cases, a nobleman would have sufficent influence to be able to pressure his local town authorities into raising the militia in his support. The arms and equipment of the different militias varied considerably, but consisted basically of sallet, jack, sword, buckler and dagger, and various assortments of poleaxes, bills and the like. Up to a third might be armed with bows.
Many of the company commanders were professional soldiers, not necessarily knights (though many achieved knighthood by virtue of their performance in battle). In action, men were usually grouped together in companies armed with the same type of weapon. The lords' household badges (which differed from their personal badge) were worn by their retainers, and served both as a means of identification and as a rallying point in battle. Jasper Tudor's household badge was a golden draught horse, and the Earl of Wiltshire's a golden griffen. Sir William Herbert may have used a green dragon, whilst the livery worn by York's troops was azure and murrey.
A typical army would have had a wide range of equipment in both type and quality. It is, incidentally, perhaps worth mentioning that, contrary to popular legend, a soldier wearing full armour was not normally incapacitated if he fell over, nor would he find his movements particularly restricted unless joints of his armour had been damaged in battle. The normal weight of a suit of armour was between 50 and 70 lb.
The Irish troops serving with the Lancastrians had some special characteristics. They were probably armed in a variety of ways ranging from, in a few cases, arms and equipment very similar to that of the English and Welsh troops, through gallowglasses armed with doubleedged battleaxes, to lightly-equipped kerns with little or no body armour, and armed with javelins and daggers.
No details are known of the French and Breton troops serving with the Earl of Pembroke. They may have included spearmen (as were many of the Welsh contingent) and crossbowmen.
THE BATTLE
On learning of the approach of the Lancastrian forces, Edward and his army had moved out of Ludlow, and taken up position at Mortimer's Cross. The terrain over which the battle was to be fought is largely unchanged, although the slopes of the hills would have been more thickly wooded than is the case today, and the fields unenclosed by hedges. At Mortimer's Cross two valleys meet at right angles, and the old Roman road, running roughly northsouth, crosses the route from Ludlow to Prestigne and Central Wales. The site of the actual battle was probably a little to the south of the crossroads, and is traditionally marked by the remains of a tree known as the Battle Oak.
Edward's forces formed up on a frontage of just under 500 yards, astride the Leominster-Wigmore road, and occupying most of the watermeadow between a spur of Shobdon Hill and the River Lugg. The slope of the hill at this point was both steep and well-wooded, and would have provided a possible site for an ambuscade of Yorkist archers. Thus protected on his right, Edward's left flank was covered by the river. (A number of accounts of the battle place the Yorkists with their backs to the river and have the Lancastrians approaching via the road from Prestigne. This however seems unlikely for several reasons. The Lancastrians, especially in such wintry conditions, would have had no reason to choose such a difficult route, passing as it did through some of the wildest parts of Central Wales, and, even if they had, Edward could have blocked their advance at a number of more suitable points.
As dawn broke on the bitterly cold morning of February 3rd, St Blaise's Day, the Yorkists had the considerable initial advantage of being rested, and of fighting on ground with which many of them were familiar. Some, at least, may also have been heartened by an incident which had occurred on the previous morning. As daylight broke, three suns had been seen in the sky. The cause was the natural phenomenon known as a "parhelion", caused by the refraction of light through ice crystals. It is highly unlikely that either Edward or anyone else present knew this, but the Yorkist leader showed some of his natural skill as a medieval war leader, rising to the occasion and seeing that "the people had great marvel, and therof were aghast, the noble Edward them comforted and said "Be of good comfort and dread not, this is a good sign, to these three suns betoken the Father, Son and the Holy Ghost, and therefore let us have a good heart, and in the name of Almighty God go we against our enemies."
The Lancastrians left their baggage waggons, drawn up in a circle and chained together, at the site, about a mile south of the Battle Oak, where' they had camped on the previous night, and advanced towards the Yorkist position. Presumably, Jasper Tudor also deployed in the usual three divisions. The Earl of Wiltshire, with his Irish, and perhaps the mercenaries, formed the left. The Earl of Pembroke commanded the Main Battle in the centre, with more Welsh troops, very possibly commanded by Owen Tudor, on the right.
Often in battles of this period, some last attempt at conciliation or bargaining was made, and there is a tradition that Edward sent his herald, Blue Mantle, with a proposal that the two commanders should settle the affair in single combat. It is unlikely that any such offer was seriously intended, and Blue Mantle's real mission may have been to gain intelligence. If so, he possibly paid a high price, as there is another tradition that he was killed by treachery, and a cottage on the battlefield still bears his name.
The Lancastrians probably advanced in line, on foot, and the battle no doubt opened with the customary duel between the opposing archers. The Yorkists probably had rather more of these, and there is some suggestion that Wiltshire's men on the Lancastrian left suffered particularly heavily from the effects of their fire. Wiltshire himself had a reputation for having a keen sense of self-preservation, and he is reported-to have followed his instincts at Mortimer's Cross and to have made off at the start of the battle! However, his Irish, at least, were made of sterner stuff, and evidently followed their customary tactics and launched a furious charge against Edward's right. It has been credibly suggested that a verbal tradition of this encounter is preserved by the 16th century poet, Michael Drayton:
"The Earl of Ormonde... came in the vanguard with his Irishmen,
With darts and skains; those of the British blood,
With shafts and gleaves, them seconding again,
And as they fall still make their places good,
That it amazed the Marchers to behold
Men so ill-armed, upon their bows so bold."
The Yorkist'right, probably under Sir William Herbert,' may have been forced back a short distance, until the arrow storm, and superior discipline and equipment, possibly_ coupled with a flank attack from the wooded slopes, gradually gained the upper hand and the Irish attack faltered and began to break.
Meanwhile, Edward's centre and left had held and turned back the advance of the other two Lancastrian divisions, and Pembroke's men, with Herbert angling in from the right, were pushed back towards the banks of the Lugg. Many were surrounded and slaughtered, some being drowned attempting to break out across the river.
Other Lancastrians fled southwards, reaching the Lugg near Covenhope, where another massacre took place, Apparently, judging by relics found in the 19th century, a last stand was attempted at the baggage train, where some Lancastrian leaders hoped to find horses on which to escape. Jasper Tudor was amongst those who succeeded.
Yorkist losses in the battle, whose duration is unknown,_ were apparently quite light: certainly no leader of note seems to have been among the casualties. The Lancastrians however suffered severely, not least in the pursuit and in the series of executions, in which elements of an inter-clan Welsh vendetta played a part, which took place after the battle. Among the victims of this were Owen Tudor and other "Welsh persons of the first distinction."
His victory at Mortimer's Cross freed Edward to march on London, be proclaimed King, and begin the campaign which was to climax on March 28th with his crushing victory at Towton. The Yorkist dynasty had begun.
Wrgaming the Battle: OOB and Map
Back to Battlefields Vol. 0 Issue 0 Table of Contents
Back to Battlefields List of Issues
Back to Master Magazine List
© Copyright 1995 by Partizan Press.
This article appears in MagWeb.com (Magazine Web) on the Internet World Wide Web. Other military history and related magazines are available at http://www.magweb.com