1 PREAMBLE
This game can be played mano a mano, but is a lot more fun played as a club project. Because individual players will only be controlling relatively small forces, moves should be reasonably quick. Time length should be agreed before the game starts, either until all the retreating forces have escaped, or the bridges are blown. (See scenario instructions for an explanation.)
2 HISTORICAL BACKGROUND
Allied forces stormed ashore along the Normandy beaches on June 6 1944. Overtrained for the assault role, neither they, nor their commanders were ready for the war of manoeuvre that briefly opened up. As German reinforcements arrived, the British and American armies ground their way forward, measuring gains in tens of yards and casualties in hundreds, casualties that the British in particular could not afford.
Stretched ever thinner, eventually the German line had to give somewhere and on 24 July, the American First Army broke through at St LU. On 1 August, General George Patton activated the American Third Army and swept westwards towards the Brittany ports, as well as south and east through Avranches towards Orleans. This move across the rear of the Germans still facing Hodges and Montgomery was assisted by Hitler's decision to throw what remained of his Panzer divisions into the Mortain counterattack. Stopped cold, and harried by swarms of fighter bombers, there was now little that could be done to hold France. What remained of the German army was now trapped in a deep pocket, with the only opening near the town of Falaise.
We are not interested in the controversy or arguments over whether the gap could or should have been closed. The following game attempts to re-create the confusion as German units try to escape the trap and allied forces try to stop them.
3 THE GAME OBJECTIVE
The German objective is to get as much equipment over the bridges and off table as possible and deny the bridges to the advancing Allies. They get nothing for capturing or destroying Allied units. The Allied objective is to capture or destroy as much German equipment as possible, to capture the bridges intact, and to exploit over the river.
4 GAME SET UP
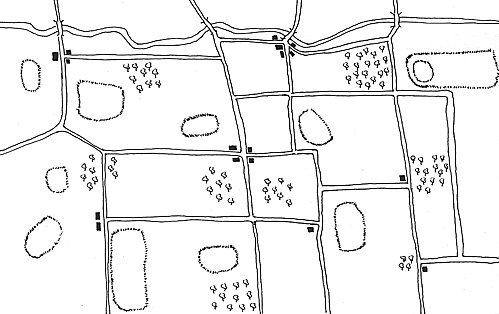
The terrain is really up to you; the map accompanying this article is for illustrative purposes only. You want to put a river along the longest side, crossed by at least three bridges.
There should be at least six road entrances along the other four sides. Apart from these, sprinkle hills, streams, woods, villages, etc. to your heart's content. The road network should lead to the bridges, but there should be a liberal amount of turn-offs and cross ways. Remember that roads tended to go round the field patterns, so corners should be almost 90°.
The forces are based on companies, squadrons and artillery batteries. In Command Decision terms, the rules I use, these are represented by a maximum of five bases. If you are using skirmish level rules, fight at a lower level of platoons, troops and artillery sections, since the overall objective is not to have too much on the table. To be truthful, I have yet to play to any set of skirmish level rules that reflect a true level of casualties, or that properly restricts actions and events during the short spell of time that the bound represents.
STEP 1
Make out a card for each element you want to use, both Allied and German, detailing the weapons and vehicles involved as well as anything else necessary in your own rules (such as morale and training), e.g. "1 Recon Company of Panzer Division Recon Battalion, 1 Command Sdkfz 234/1, 1 Recon Sdkfz 234/3, 1 Recon Sdkfz 234/1, 2 Recon Sdkfz 234/2s; Veteran/10." or "1 (American) Armored Infantry Company, 1 Command stand, 1 Weapon stand, 3 Infantry stands, 4 M3 Half-tracks, 4 Bazookas; Regular/8."
They can also include any special house rules, such as "(German) Light Artillery Battery of standard Infantry Division, 1 mounted command stand, 1 gun crew stand, 1 105mm howitzer, 1 limber, 1 ammo wagon, 1 support stand; Experienced/8; No ammunition." Remember to include HQ units to control all these, and assign a numeric value of between 1 and 10 to each unit. These values should not be obvious, i.e. a three lorry convoy of supply trucks may be more valuable than a company of Panzer IVs. You will also need to make out one additional card for the Germans "1 German command car, containing one panicking German General." Keep the German and Allied cards separate. Assign a die roll to each road entrance.
STEP 2
The German defenders will automatically get 1 Battlegroup HQ, 1 Company of 'Chain-dogs', 1 Company of 'leg' infantry and 1 Company of Engineers, including their vehicles. In addition, each player will draw a card from the German pile.
STEP 3
All the German units are placed on the table, although if you have hidden rules, use them. No unit may set up within 24 inches of the road entrances, and all except the engineer company must be on the "Allied" side of the river. Units can be in hasty entrenchments. The engineer company should be placed adjacent to any of the bridges.
STEP 4
All the remaining German and Allied cards are shuffled together, along with some blank cards; roughly half the number of real cards is best.
STEP 5
The Engineer company is responsible for preparing the bridges for demolition. To represent the successful laying of the explosives, each move that the company is at a bridge, roll a D6: 6 indicates success. If unsuccessful, add a cumulative 1 to the next roll until wiring is achieved. Once laid, the demolition must be guarded, either by some of the engineers, or by other units. If you use engineers, subtract 1 from each subsequent 'wiring' die roll for each section missing.
5 THE GAME
At the beginning of the move, each player in turn will take the next card from the pack, and declare if it shows a unit. They will then die roll to see on what road it appears, and deploy it during the ensuing movement phase. If a player draws an Allied formation, he will give up any German command he might have, and if he subsequently draws another German force, returns the card to the bottom of the pack. When Allied and German players are equal in number German players will ignore any Allied cards and return them to the bottom of the pile. In case you are wondering: yes, it is intentional that players will be commanding units at different stages of an advance/retreat and scattered at different ends of the table.
The game is played to your usual tactical rules, but the Allied players should bear in mind that until a Task Force or similar H.Q. is drawn, co-operation between on-table units is purely the player's choice. If you are using both American and British units, you will need to include at least a brigade H.Q. to co-ordinate them.
The German forces are trying to escape from the trap, so the German H.Q. is tasked with choosing which units are to cross the bridge, and which are to act as rearguard. Since the retreating units will be trying to get over to safety, the German commander will need the 'Chain-dogs' to pull units off the road and form small battlegroups. He is also responsible for blowing the bridges, using your normal engineering rules.
The panicked German General card, when played, means that the staff car will appear on the road as indicated, and drive at full speed towards the nearest bridge. It can only be stopped:
- A by an Allied unit capturing or destroying it, or
B by the German 'Chain-dogs' stopping it by blocking the road, or
C by any German HQ unit stopping it by blocking the road.
If the General reaches a mined bridge, and after all movement is finished, he will try to order the covering force to blow it. Roll a D10: if the score 9 or 10 the bridge is blown, 6, 7 or 8 means that he stays arguing and roll again next move, anything else and he gives it up as a bad job. Once one bridge is blown, at the beginning of the next bound check the others in the same way. A roll of 5 or less indicates that the covering force ignores the explosion and asks for orders. Obviously, if you can get a H.Q. unit or the 'Chain-dogs' to the bridge it question before the die roll(s), they can either arrest the General or negate the die roll.
6 ENDING THE GAME
Assuming that you are not playing for a limited time, the game ends:
- A When the cards are all drawn, all possible German units have left the table, and the bridges have been blown.
B When the first Allied unit crosses the river and reaches a road exit.
C When the bridges are blown, even though there are still cards left to draw or German units still on the 'Allied' side of the river.
In A above, count up the value of the units that left the table and compare to the value of those captured or destroyed, pro-rata'ing where necessary. If the escapees exceed the non-escapee's value, the Germans have won.
In B above, count up the value of the units that left the table, take half of the value of those still left and a quarter of the value of undrawn German cards. Compare that to the value of the units captured or destroyed, the remaining half value of the on-table units and the remaining three quarters of the value of the undrawn cards. If the former is higher, the Germans have won, if the latter, the Allies.
In C above, count up the value of the units that left the table and compare to the value of those units still on the table together with the value of the undrawn cards. If the former is higher, the Germans have won, if the latter, the Allies.
7 OTHER IDEAS
You will note that I have not mentioned airpower in the game. This is because different rules systems manage aircraft differently. If you are confident that you have a set that deals with CAS efficiently, then put some air support cards in the pack and draw them as usual.
Although you should include some cards for artillery, you could also have F.O.O.s attached to H.Q.s for off table artillery. Remember however that German artillery was getting short of ammunition, so restrict the amount of support it can give, or check if it gets hit by fighter-bombers, etc.
BIBLIOGRAPHY
This is somewhat superfluous since we are not doing' a true re fight. The last year has seen some good books being published and republished on the Normandy campaign, but two that I found particularly useful are:
CARLO D'ESTE "Decision in Normandy" William Collins and Son 1983 Republished Harper Perennial 1994
JOHN KEEGAN "Six Armies in Normandy" Jonathan Cape 1982 but several subsequent paperback editions
Back to Battlefields Vol. 0 Issue 0 Table of Contents
Back to Battlefields List of Issues
Back to Master Magazine List
© Copyright 1995 by Partizan Press.
This article appears in MagWeb.com (Magazine Web) on the Internet World Wide Web. Other military history and related magazines are available at http://www.magweb.com