Last issue we discussed the 3 Step Technique. Today we will discuss the Layering technique. Often referred to as The Old Timers Style, this style makes great looking mlnlatures.
BEFORE YOU PAINT
Once you have found that perfect miniature and opened the package you will need to prepare your figure. As with the 3 Step Technique this process is the same.
Use a rat-tail file and craft knife to clean up any flash and lines left from the molding process. Pay special attention to areas between the arms and legs. Once your figure is cleaned up, base your figure if desired (when doing stands of figures skip this). At this stage many people mount the miniature to a roofing nail to easier hold while painting.
At this time, prime the miniature. I have found that white paint applied with a flat or shortened old brush works best. A seperate primer is not necessary.
You are now ready to begin painting. Unlike the 3 Step Technique you will add the black inking at the end.
PAINTING
When using any technique paint the miniature as if it were dressing. Start with the flesh and continue with pants, shirt, belts, coat. Leave the armor and hair for last.
The Layering Technique uses a colors tone to create the depth in painting a miniature. Often thought as a quicker method in painting, this technique does not use inks or washes to create depth.
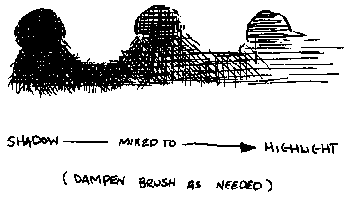
The Layering Technique starts with the darkest color as the base coat. The middle color is then applied to all but the deepest areas. And last is the lightest color applied to the highest areas.
Throughout the steps I will use painting flesh as my example. The steps are the same no matter what part you are painting.
For flesh the colors I would use are a dark brown, flesh, light flesh (almost white).
STEP 1: BASE COAT
Start with your dark brown and paint all flesh areas. Do not worry about painting to the edges as this will be fixed at the end with the blacklining.
STEP 2: MIDDLE COLOR
Once the brown base is dry you are ready to apply the flesh color. Similar to drybrushing, apply the flesh color to all but the deepest areas. You will see how the dark brown now creates shading.
STEP 3: HIGHLIGHTING
When the middle color is dry you are ready for the highlights. This third step is similar to painting hair and fur. Simply drybrush the lightest color onto the raised areas creating the depth you desire.
FINISHING
Repeat the steps for the rest of the figure. Paint fur and metal by first painting the area black and drybrushing with the desired color.
Black line with paint or ink all areas that meet; such as cuffs, sides of belts and straps, along seams and edges. This will seperate and define the areas of your miniature creating a professional finished look.
Lastly once completely dry apply a clear protective finish. I have found Krylon Matte Finish # 1311 to be the very best. This clear spray can be found at professional art supply stores.
ADVANCED LAYERING
The three steps show the most basic way to complete the Layering Technique.
 The first advanced technique is the Never Wash Your Brush Style. By placing your three colors side by side on your pallette you can blend the colors as you load your brush, never needing to wash between layers. This blending gives a quick, professional look to your miniatures.
You may paint as many layers as you wish, to create a gradual transition from shadow to highlight.
The second technique requires a quick hand.
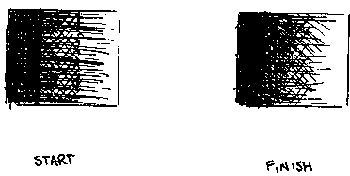
Holding a clean second brush in your hand, apply the middle color as normal and with the second brush wet (not dripping) blend the edges into the dark area. When I am painting in this style I lick the blending brush using spit to blend the edges. Repeat the process with the highlight color.
 This technique is very smilar to painting with oils (definitely a future article).
As you paint more you will find that you will develop a style of painting. Most styles are a combination of techniques and happy mistakes.
The Layering Technique is a good style for beginners as it shows in the simplest way the basics of creating depth and quality in painting miniatures. This style of painting is easily adaptable with other techniques (such as the 3 Step) in creating a quality painted miniature.
In my next article I will address an area not yet touched upon: Finishing the Base, and other cool type stuff.
Back to Renaissance Ink Issue 6 Table of Contents
© Copyright 1995 by John Jay Wirth
This article appears in MagWeb (Magazine Web) on the Internet World Wide Web.
Other military history articles and gaming articles are available at http://www.magweb.com